Paper Pumpkin Craft
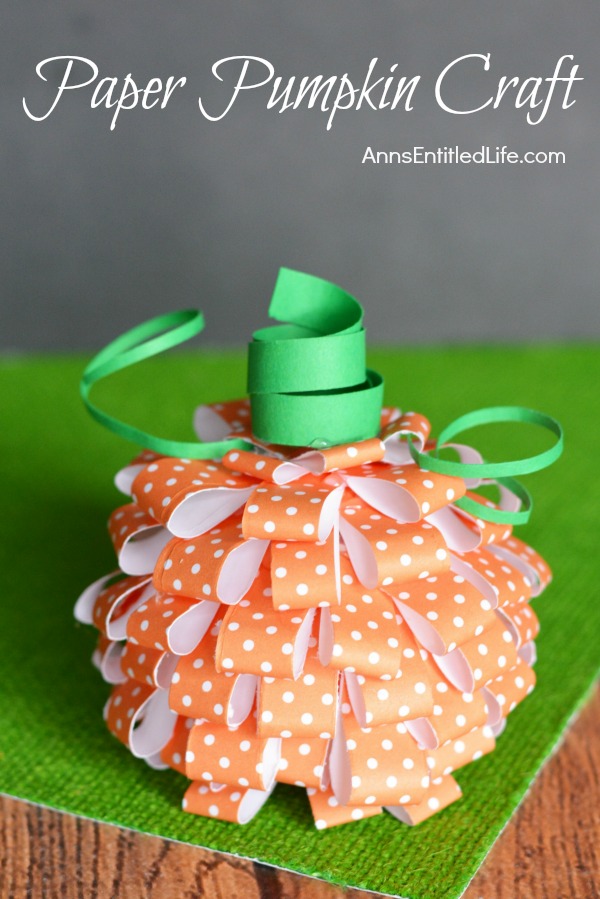
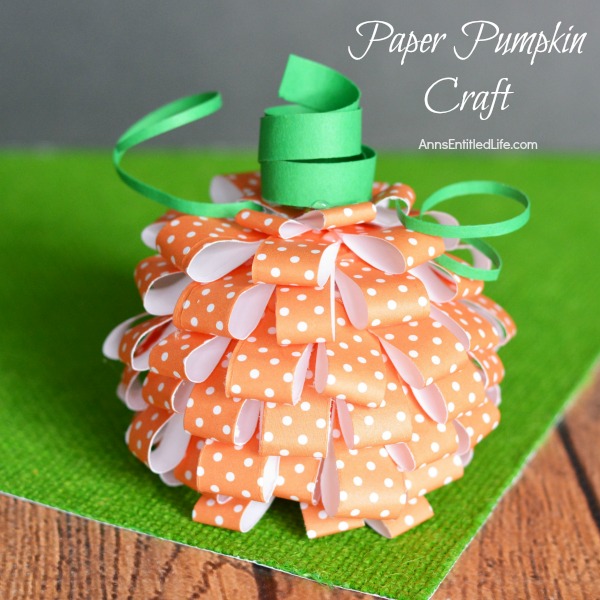
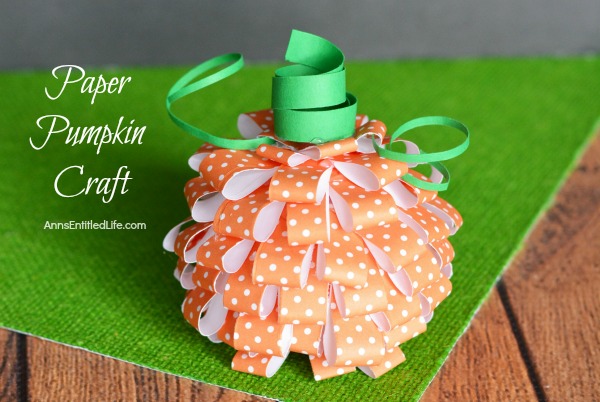
This sweet little Paper Pumpkin Craft is perfect for autumn decor! Make one, make three, make a dozen; the more the merrier and they are easy to fabricate. Whether looking for mantel or tablescape decorations or just a whimsical adornment for a side table or windowsill, this simple to make Paper Pumpkin Craft is a great addition to your fall decorating scheme.
Paper Pumpkin Craft Materials:
● 1 3″ Styrofoam Ball
● 1 12″ x 12″ Sheet of Scrapbook Paper (Used on this project was Orange Small Polka Dot Paper by Recollections but you can use any 12″ x 12″ scrapbook/ cardstock paper you like!)
● Green Card Stock Paper
● Pencil
● Glue Gun
● Glue Sticks
● Paper Trimmer
● Knife
Paper Pumpkin Craft Directions:
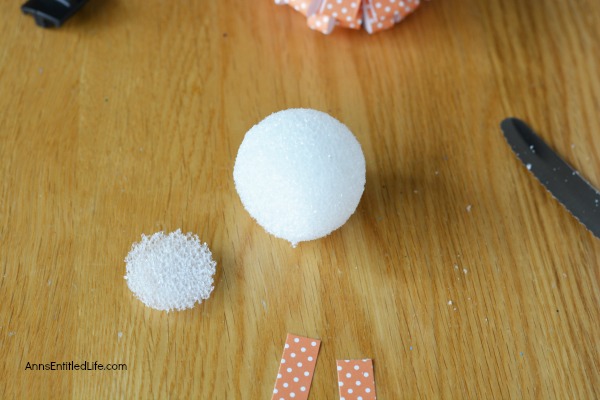
● Trim the bottom of a 3″ Styrofoam Ball so it is flat.
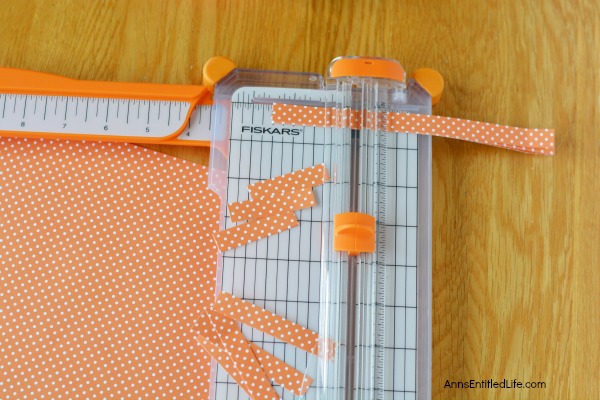
● Use a paper trimmer to cut the 12″ x 1/2″ pieces of scrapbook paper. Trim those cut scrapbook paper pieces into the smaller dimensions listed below:
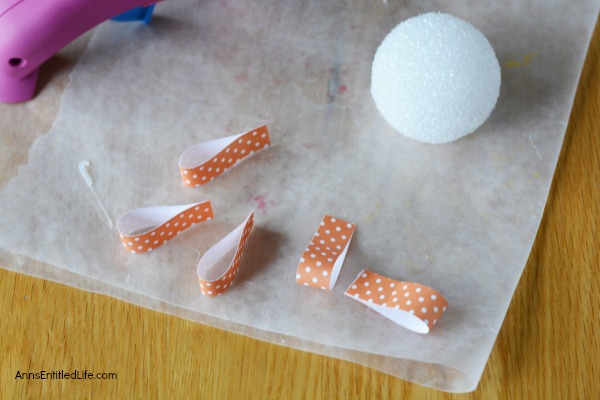
● The paper on the bottom is 3″ x 1/2″ strips. Cut Cut 10 3″ x 1/2″ strips.
● The paper on the sides is 2″ x 1/2″ strips. Cut 40-50 2″ x 1/2″ strips.
● As the paper nears the top, it is about 1.5″ x 1/2″ strips. How many you cut really depends on the look you want, and when you decide to begin to taper your pumpkin. As shown, you’ll need about 12-20 strips
● Use hot glue to glue the paper together on the ends forming a loop, orange patter (color) to the outside.
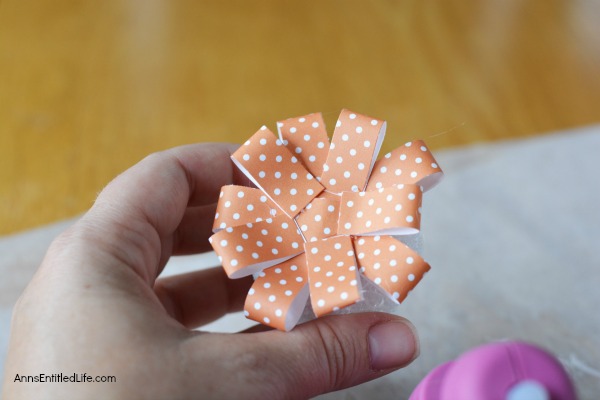
● Glue the 3″ strips on the bottom. Begin at the bottom of the Styrofoam ball, put the bottom layer all the way around the Styrofoam.
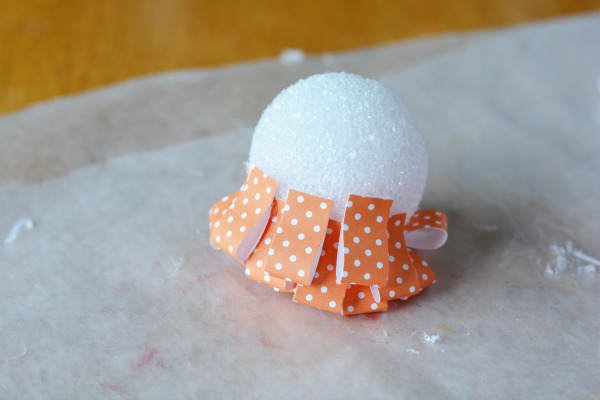
● Next, glue the 2″ strips moving all the way around the Styrofoam ball. When you have finished one loop around, do another. Stagger them a bit (as shown in the photo) so they are not on top of one another, and you have some stacking. You do not want holes though.
● As you get closer to the top, you’ll need to use shorter 1.5″ strips. Again, stagger them a bit (as shown in the photo) so they are not on top of one another, and you have some stacking. You don’t want any holes, but you do want it to have texture and “fluff”.
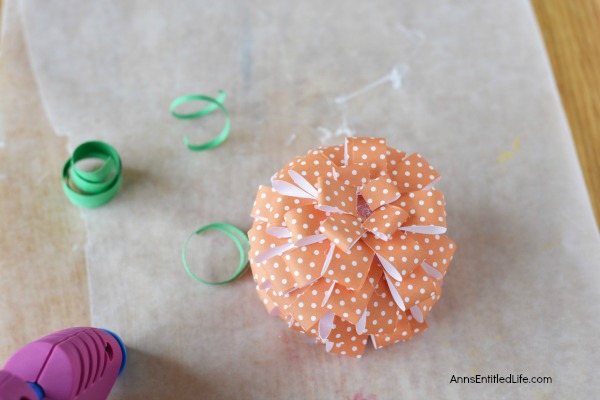
● Finish covering the entire Styrofoam ball with the orange cardstock/ scrapbook paper.
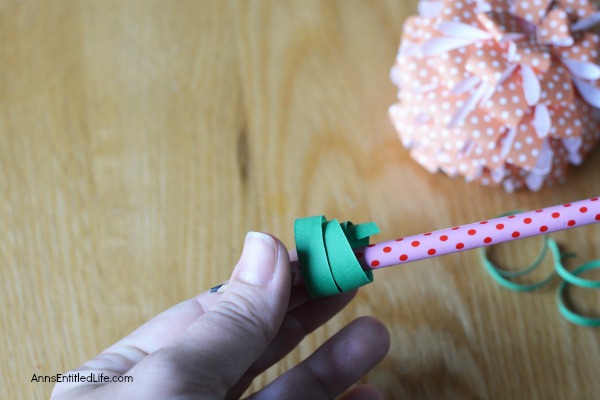
● To make the stem, cut a 1″ wide x 4″ long piece of green cardstock paper and wrap it around a pencil to create a stem.
● Wrap the cut green cardstock around the pencil to create the fat stem. Wrapping it around the pencil creates a spiral effect.
● Remove from the pencil and then, attach that fat stem onto the top of the pumpkin with hot glue. You will attach the stem directly on top of the orange pumpkin.
● Cut a few very small thin (1/8″ thick was used on this tutorial) strips of green cardstock paper and wrap them around the pencil to create vines. Hot glue both to the top of the pumpkin as desired.
Now your adorable Paper Pumpkin Craft is ready for display! Make it some friends in different colors and patterns for your own Paper Pumpkin Patch!
● To print out the Paper Pumpkin Craft instructions, click here.
● Disclosure: the links in this post may be affiliate links.
● For more Craft posts on Ann’s Entitled Life, click here.
● If you enjoyed this post, be sure to sign up for the Ann’s Entitled Life weekly newsletter, and never miss another article!
Victoria @DazzleWhileFrazzled says
Very cute and sweet little pumpkins. Fall is the best season! Visiting from Talk of the Town party.