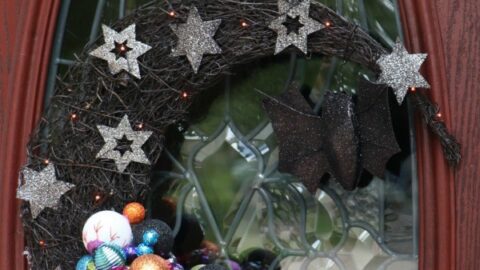
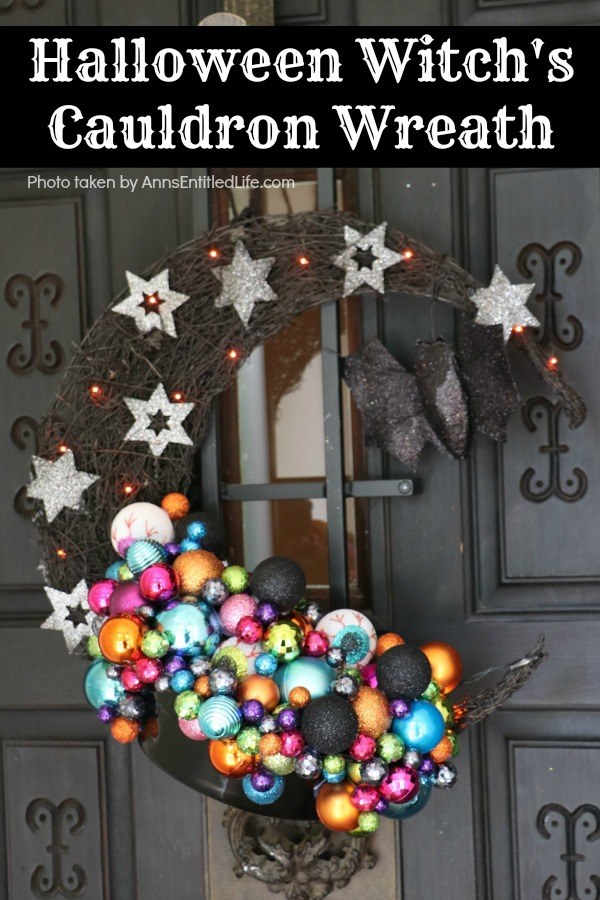
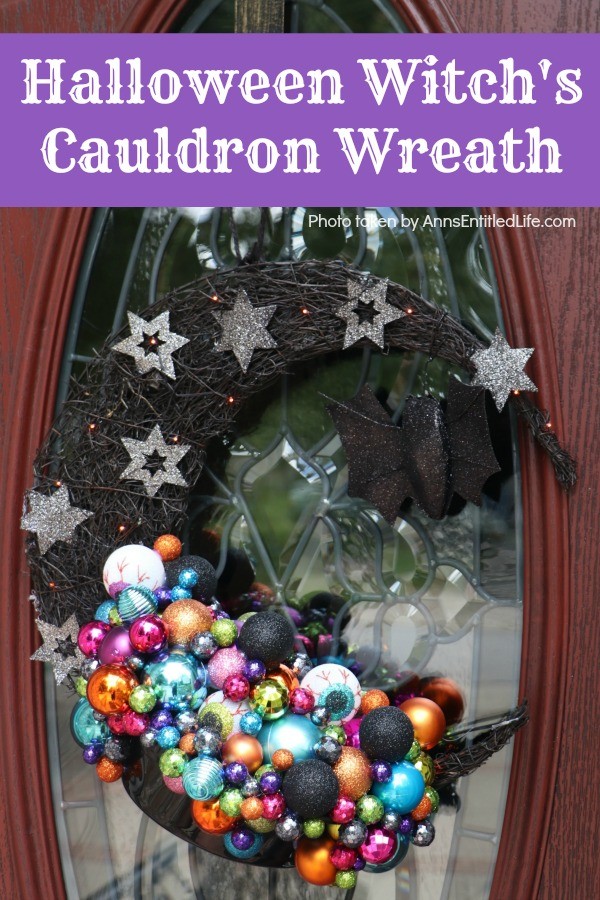
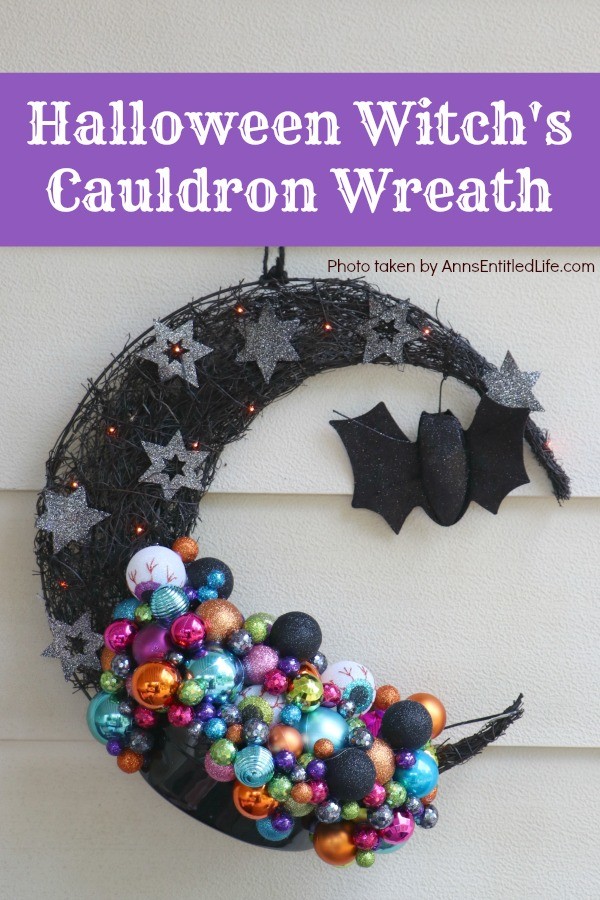
A step-by-step guide on making a Halloween wreath inspired by a witch’s cauldron! This easy-to-follow tutorial teaches you how to make a Halloween witch’s cauldron wreath. This wreath is the perfect Halloween door decor your trick or treaters will love!
With apologies … Bubble, bubble, toil, and trouble …
Homemade Halloween Witch’s Cauldron Wreath
Song of the Witches
– Williams Shakespere
(from Macbeth)
Double, double toil and trouble;
Fire burn and caldron bubble.
Fillet of a fenny snake,
In the caldron boil and bake;
Eye of newt and toe of frog,
Wool of bat and tongue of dog,
Adder’s fork and blind-worm’s sting,
Lizard’s leg and howlet’s wing,
For a charm of powerful trouble,
Like a hell-broth boil and bubble.
Double, double toil and trouble;
Fire burn and caldron bubble.
Cool it with a baboon’s blood,
Then the charm is firm and good.
Needless to say, that verse has been percolating in my mind the last few weeks! I may have taken some poetic license to make the idea come together.
I have completely revamped my Halloween foyer décor, and the theme is witches!! I took my fabulous Easy DIY Halloween Glitter Witch’s Broomsticks and added Homemade Halloween Witch’s Cauldrons and now all I needed was a wreath to tie it all together!
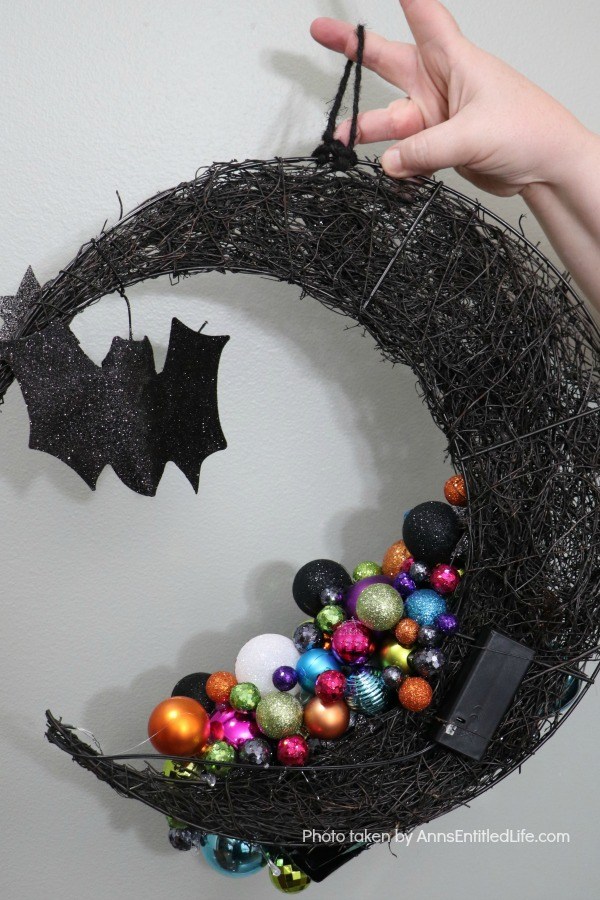
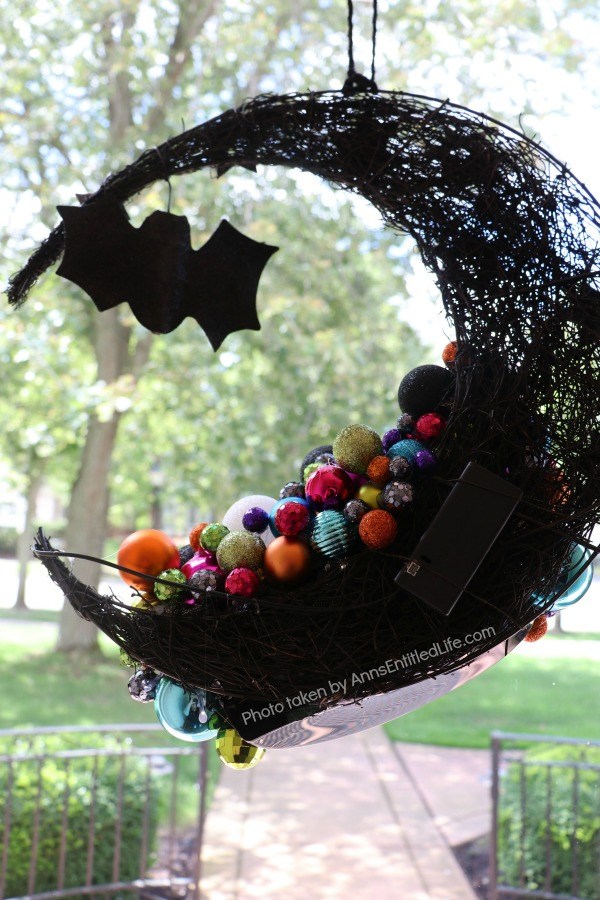
When I was bugging my niece to make those cauldrons, she came up with the crescent wreath idea. She saw that fabulous lighted half-moon wreath at Joann’sand snagged it but quick! When she showed me it, I immediately grasped the concept and was on board with the plan.
This can be done with almost any black wreath. You just have to adapt the idea to what you have on hand or can find in your local craft store.
This wreath, unlike the cauldrons, was done very quickly. It is small so it only took about 45 minutes and that was with our fashioning a “cauldron” out of a small black party hat. If you can find a small plastic cauldron that fits your wreath size, it will probably only take you half an hour to make a medium (17″) Witch’s Cauldron Wreath.
Unlike the cauldrons. this Halloween Witch’s Cauldron Wreath was not expensive to make. Well, the wreath itself wasn’t cheap, but that was due to the lights being built into it. You can definitely do this for under $40 IF you find the dollar store eyeballs, have some of the pink, aqua, bronze, etc., shatterproof bulbs in your Christmas tree bulb-stock, and can find a reasonably priced black wreath at your local craft store.
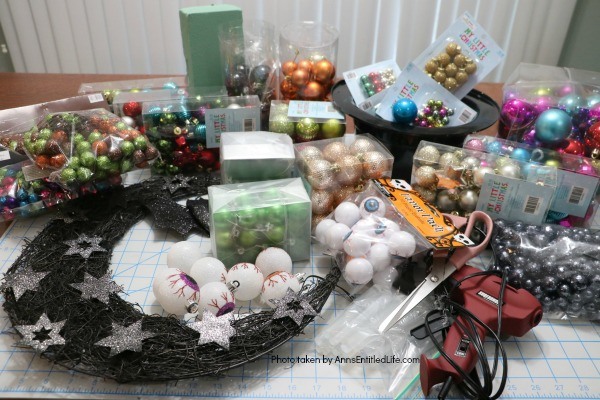
Now, again, the question – how many bulbs? The answer? I don’t know. We used next to nothing of what is shown in the materials photo (the leftovers all went to making another cauldron and more wreaths). How many bulbs you use will depend on how big the cauldron you want to fill is, if you make a spill, and how large the bulbs you use are, and how many of the larger (medium) sized bulbs you decide to use on your craft. So much of crafting is personal taste and ideas.
Homemade Halloween Witch’s Cauldron Wreath Notes:
● This craft is about textures and sizes as well as colors. You will want to make sure to buy different textured bulbs such as sparkly, matte, shiny, dimpled, etc. Purchase different sized small bulbs as you will start small and end up tiny. You are not just matching or complimenting colors, you are matching and complimenting textures, colors, and sizes.
● Make certain the bulbs you purchase are shatterproof!!!
● Make sure you take a step back from your cauldron while adding bulbs. This was quite important as we needed to see how visually it looked from a distance, see how heavy the wreath was, and how the textures were coming together. It helped in filling holes, and especially when we got to the part with the drips.
● If you are not purchasing a prelit wreath these spider lights and are fabulous to work with! They are a nice purple color, and they drape well and glue on easily.
● With the specialty bulbs (eyeballs, spiders, ghosts) they may not be able to be turned upside down to look “right”. Take notice of that as if your wreath is prelit, there are no spider lights to hide the caps.
● A big savings tip is to use a floral foam instead of trying to pack your cauldron with bulbs. Floral foam is also lighter!
● How many bulbs will you use? The honest answer is, “I don’t know.” It will depend on how large your cauldron is, how many medium bulbs you use, how many small, etc. I used nothing larger than 2″ was used on this wreath. The number of medium bulbs used was no more than 8, then smaller was about a dozen, when it got to tiny and teeny-tiny, a lot of bulbs were used.
Homemade Halloween Witch’s Cauldron Wreath Materials:
● Pins (optional)
● 50ct Purple and Green Shatterproof 2-Finish Christmas Ball Ornaments 2″ (50mm) – the best bang for the color buck!
● 3 cm Ornaments – purchased green, orange, purple, and black
● At Hobby Lobby I bought a lot of tiny Little Christmas in bronze, green, and gold
● Also at Hobby Lobby they have Sliver balls (that are actually a gun metal gray), as well as Thanksgiving colors. These were a FANTASIC buy for the price and how many there were.
● Darice Halloween Eyeball 45mm Plastic Mini Ornaments Set of 8 or head over to your local dollar tree store for the Specialty bulbs – there are only two eyeballs per pack, but that would make them 2/$1 and you cannot beat that price!
● Floral Foam
● Maker’s Halloween LED Half Moon with Bat Wreath was used in this craft. It is no longer available. This was the only lit crescent moon black light-up wreath I could find this year.
● Mini caudron or Small Plastic Black Party Hat
Homemade Halloween Witch’s Cauldron Wreath Tools:
● Hot Glue
● Hot Glue Gun
● Scissors
Homemade Halloween Witch’s Cauldron Wreath Directions:
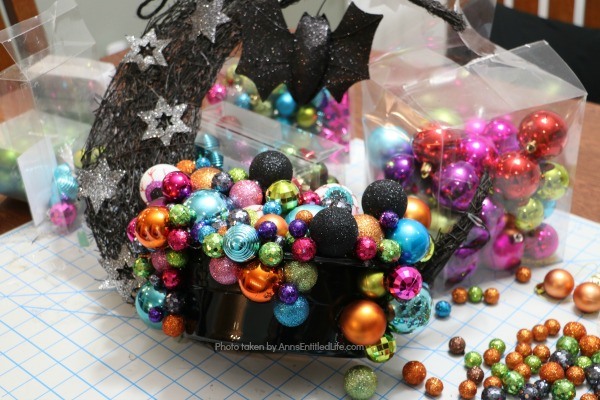
● Note: if you are working with a half-moon wreath (crescent wreath), prop it up. We used the bulb boxes.
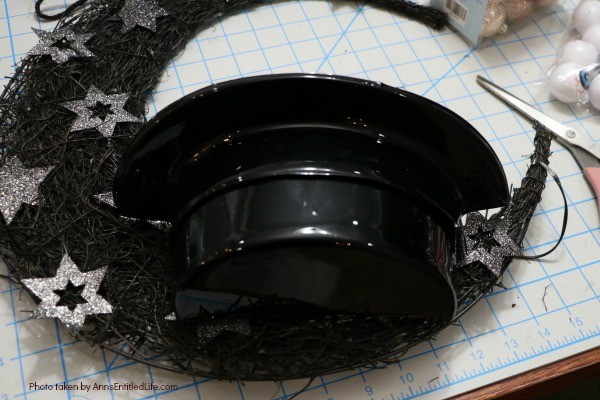
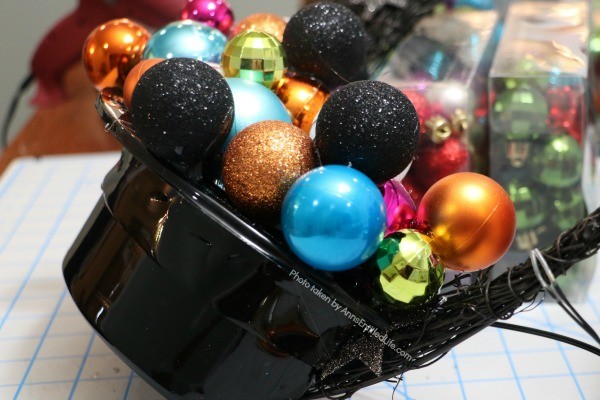
● Attach your cauldron to your wreath using hot glue. If you do not have a cauldron in the size needed for your wreath, you can make your own!
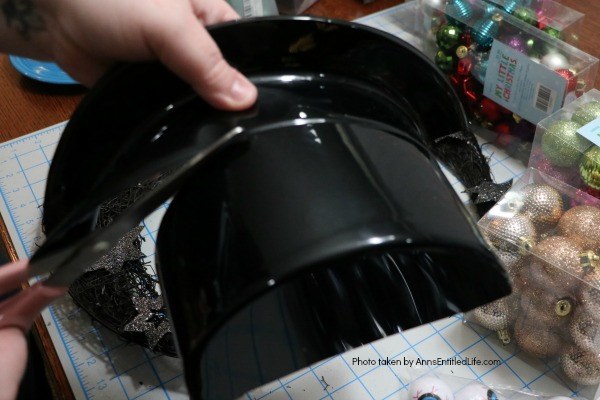
● Cut a small plastic black party hat in half. You may have to cut it down further to match the scale of your wreath. In this instance, the hat rim was cut off, more of the hat was cut down, and then the rim was hot glued back on to form a rim. The whole thing was hot-glued heavily.
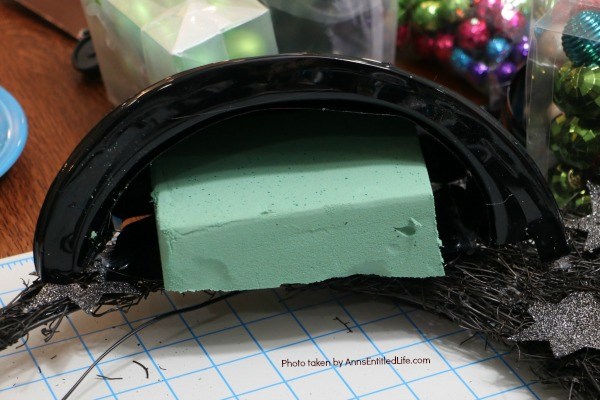
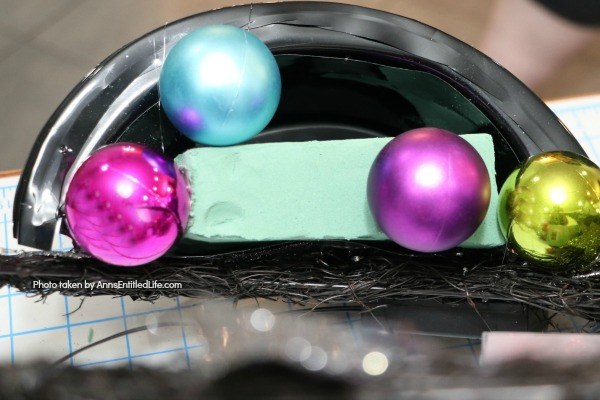
● Insert floral foam to fit the cauldron, hot glue in place. Note: use the floral foam and not more bulbs as it is lighter in weight as well as less expensive than layering bulbs in the bottom of the cauldron.
● Attach several medium-sized bulbs and hot glue to the floral. You can pin in place first if you like. If you are not pinning the caps in place, you can detach the caps from the bulbs.
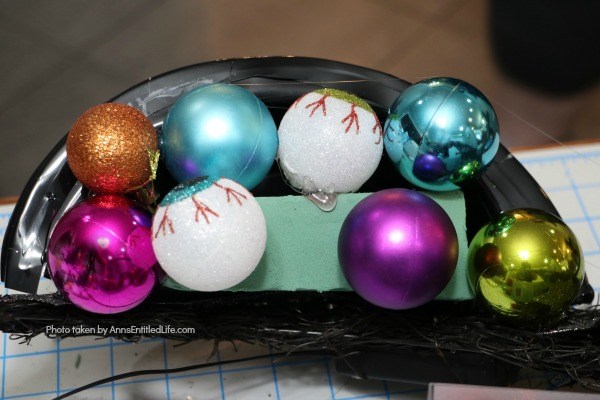
● Attach more bulbs. This is where you want to form a secure base so there is no wiggle on the upper layers. Secure your medium-sized bulbs in place well.
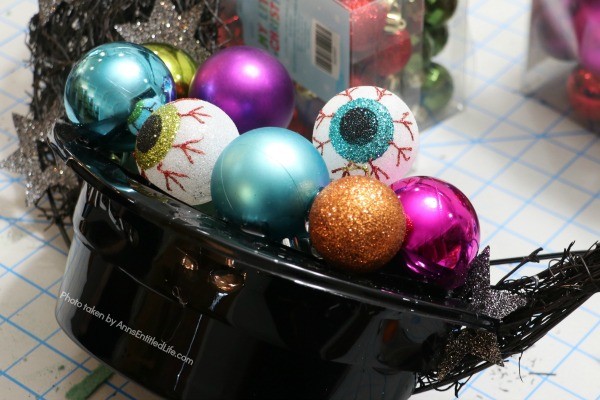
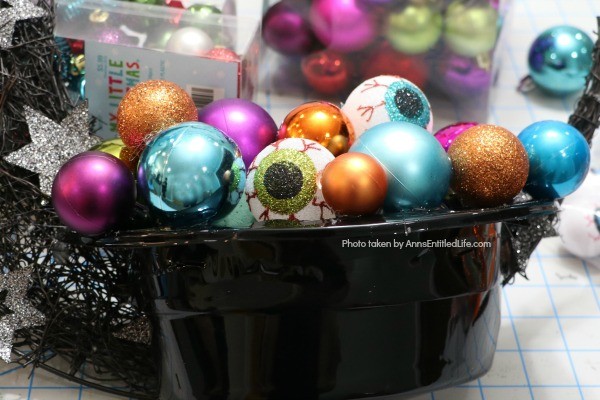
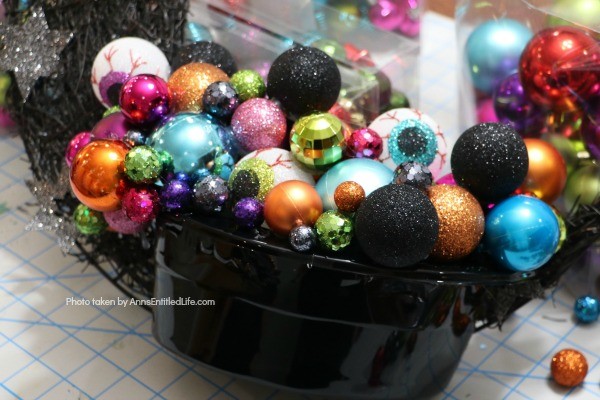
● Once you are finished securing the bottom layer of bulbs, add a few medium-sized bulbs on top for the second layer. You will also want to shift down to smaller bulbs. This whole craft is about working various textures, colors, and sizes to imitate a cauldron overflowing. Be aware of texture, size, and colors as you begin to add smaller bulbs to the next level. You may decide to add more large bulbs as you build.
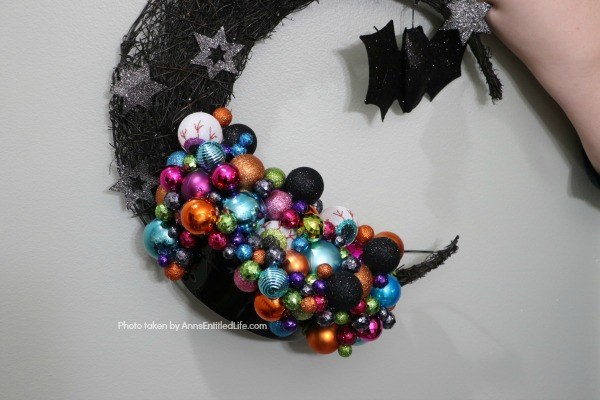
● Once the top of your cauldron is built, you will want to add some bulbs to drape down the side of your pot mimicking an overflow. Take a step back, hold the wreath against a wall or hang it on your door to see what is missing, and where you would like your spill(s). On this wreath, we chose three spills of unequal size to mimic a pot overflowing. You could also have one spill, and then have it trail across the bottom of your cauldron.
● If you are doing this with a round wreath, you may want to center your cauldron and then you will have more opportunities to have an overflow.
● Once you are done building the main two or three layers, now start adding smaller bulbs. The bulbs now are small, smaller, and smallest to imitate a bubbly drop. The colors come into play two. Since this is a black wreath and a black cauldron, fewer black bulbs were used. They create negative space, and this is a small area with a lot of black already. Keep that in mind.
● Even though you have been holding up your cauldron against a wall or door to make sure you have looked for any errant holes and to make certain that the balance was what you liked, clashing colors, lack of flow, as well as looking from above, before you clean up, give everything another look and a shake or two “just to be sure.” Make sure all your bulbs are securely fastened, and secure any that may have come loose.
● In this case, I knew I wanted to hang this on a front storm door that led to a front hall. The back was pretty untidy and showed floral foam and a hanging battery pack. I needed that covered, so the battery pack was tucked into the wreath wires. Then, more bulbs were added to the back of the wreath to cover the floral foam. These bulbs did not protrude too much, so if I decide to place this on a door it will not jut out. In this case, I know where I intended to hang the wreath meant a few more bulbs, and a few more minutes of hot gluing, but it was worth it in the end.
● Display as desired.
Homemade Halloween Witch's Cauldron Wreath
A step by step guide on making a Halloween wreath inspired by a witch's cauldron! This easy to follow tutorial teaches you how to make a Halloween witch's cauldron wreath. This wreath is perfect Halloween door decor your trick or treaters will love!
Materials
- Pins (optional)
- 50ct Purple and Green Shatterproof 2-Finish Christmas Ball Ornaments 2" (50mm)
- 3 cm Ornaments- green, orange, purple, and black
- Tiny Christmas Bulbs bronze, green, and gold
- Sliver balls (that are actually a gun metal gray)
- Darice Halloween Eyeball 45mm Plastic Mini Ornaments Set of 8
- Dollar Tree Specialty bulbs
- Floral Foam
- Maker's Halloween LED Half Moon with Bat Wreath
- Mini Caudron or Small Plastic Black Party Hat
Tools
- Hot Glue
- Hot Glue Gun
- Scissors
Instructions
- Note: if you are working with a half-moon wreath, prop it up. We used the bulb boxes.
- Attach your cauldron to your wreath using hot glue. If you do not have a cauldron in the size needed for your wreath, you can make your own!
- Cut a small plastic black party hat in half. You may have to cut it down further to match the scale of your wreath. In this instance, the hat rim was cut off, more of the hat was cut down, and then the rim was hot glued back on to form a rim. The whole thing was hot-glued heavily.
- Insert floral foam to fit the cauldron, hot glue in place. Note: use the floral foam and not more bulbs as it is lighter in weight as well as less expensive than layering bulbs in the bottom of the cauldron.
- Attach several medium-sized bulbs and hot glue to the floral. You can pin in place first if you like. If you are not pinning the caps in place, you can detach the caps from the bulbs.
- Attach more bulbs. This is where you want to form a secure base so there is no wiggle on the upper layers. Secure your medium-sized bulbs in place well.
- Once you are finished securing the bottom layer of bulbs, add a few medium-sized bulbs on top for the second layer. You will also want to shift down to smaller bulbs. This whole craft is about working with various textures, colors, and sizes to imitate a cauldron overflowing. Be aware of texture, size and colors as you begin to add smaller bulbs to the next level. You may decide to add more large bulbs as you build.
- Once the top of your cauldron is built you will want to add some bulbs to drape down the side of your pot mimicking an overflow. Take a step back, hold the wreath against a wall or hang it on your door to see what is missing, and where you would like your spill(s). On this wreath, we chose three spills of unequal size to mimic a pot overflowing. You could also have one spill, and then have it trail across the bottom of your cauldron.
- If you are doing this with a round wreath you may want to center your cauldron and then you will have more opportunity to have overflows.
- Once you are done building the main two or three layers, now start adding smaller bulbs. The bulbs now are small, smaller, and smallest to imitate a bubbly drop. The colors come into play two. Since this is a black wreath and a black cauldron, fewer black bulbs were used. They create negative space, and this is a small area with a lot of black already. Keep that in mind.
- Even though you have been holding up your cauldron against a wall or door to make sure you have looked for any errant holes and to make certain that the balance was what you liked, clashing colors, lack of flow, as well as looking from above, before you clean up, give everything another look and a shake or two "just to be sure." Make sure all your bulbs are securely fastened and secure any that may have come loose.
- In this case, I knew I wanted to hang this on a front storm door that led to a front hall. The back was pretty untidy and showed floral foam and a hanging battery pack. I needed that covered, so the battery pack was tucked into the wreath wires. Then, more bulbs were added to the back of the wreath to cover the floral foam. These bulbs did not protrude too much, so if I decide to place this on a door it will not jut out. In this case, I knowing where I intended to hang the wreath meant a few more bulbs, and a few more minutes hot gluing, but it was worth in in the end.
- Display as desired.
Recommended Products
As an Amazon Associate and member of other affiliate programs, I earn from qualifying purchases.
-
 RECESKY Purple Spider String Lights Build-in Timer - 40 LED 14ft Battery Operated Halloween String Lights for Halloween Party Decor, Halloween Decoration, Halloween Lighting, House, Garden, Yard
 -
 Black Bat Light Halloween Wreath (26 Inch Diameter) Halloween Decorations
 -
 Darice Halloween Eyeball 45mm Plastic Mini Ornaments Set of 8
● For more Craft posts on Ann’s Entitled Life, click here.
● If you enjoyed this post, be sure to sign up for the Ann’s Entitled Life weekly newsletter, and never miss another article!

Alexandra says
Wow! This is so awesome!!
Kristie says
This is gorgeous, Ann. I’m choosing it as my host feature for the Funtastic Friday Link Party. Drop by Love My Little Cottage, or one of the other hostess blogs on Sept. 26th at 9pm!
Sarah @ The DIY Mommy says
This is a beautiful piece! Love how dark and colourful it is. Fantastic job!