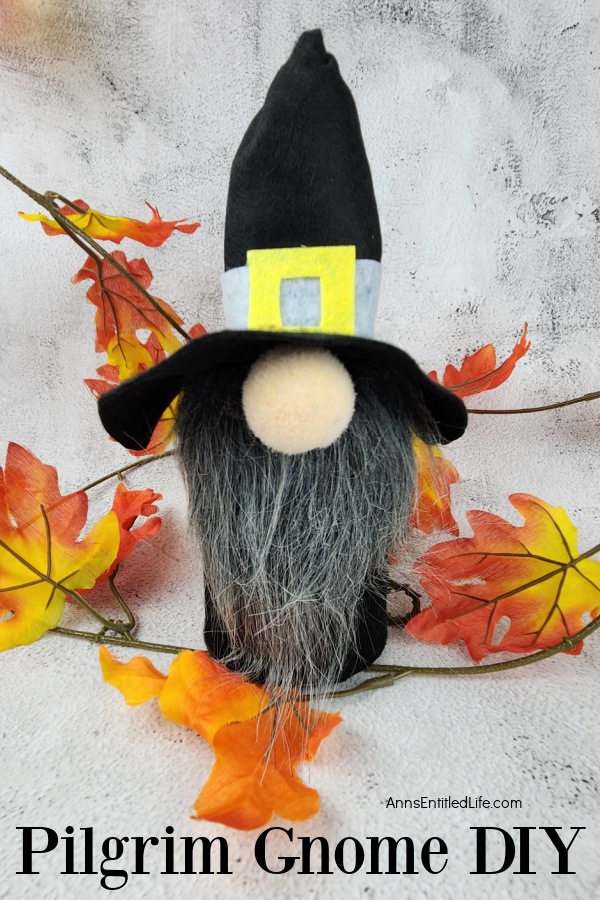
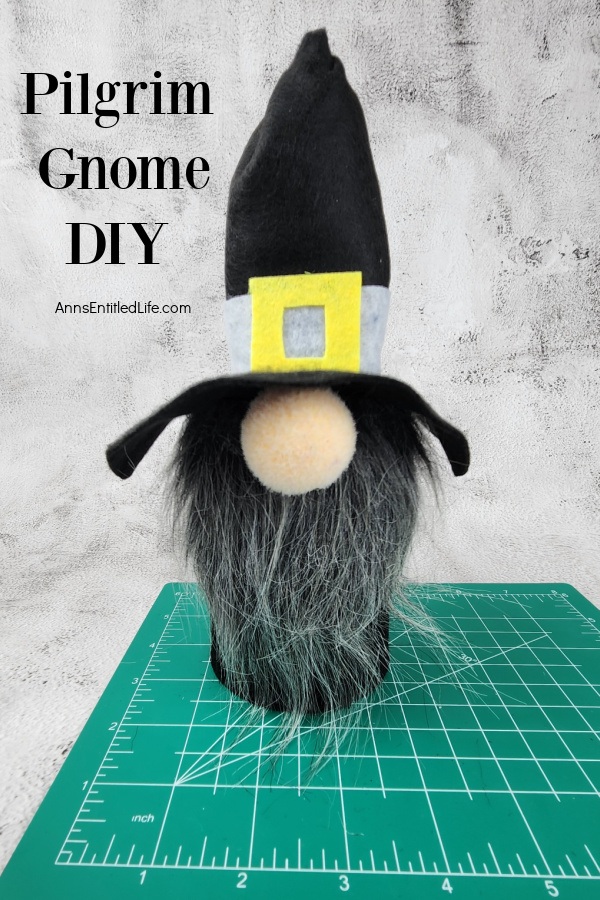
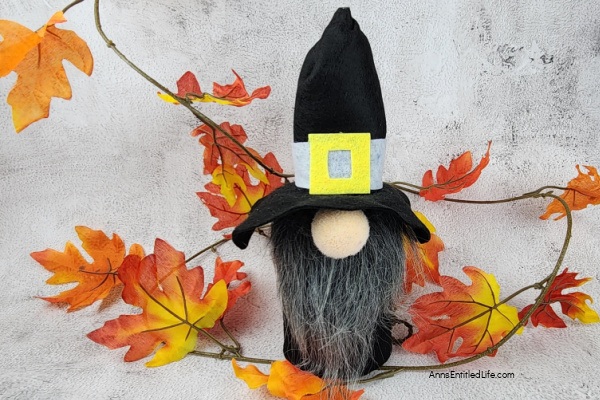
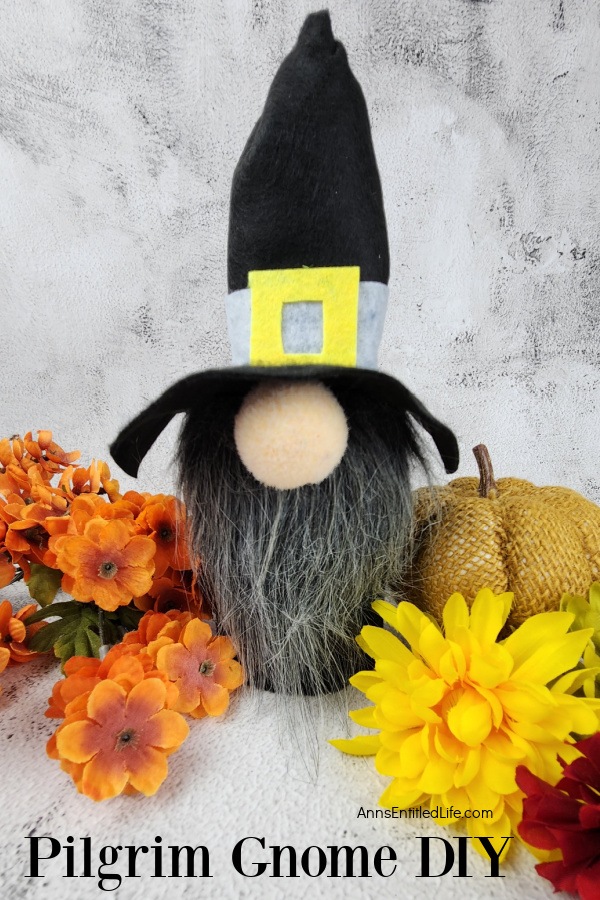
Create homemade Thanksgiving decorations with this Pilgrim Gnome DIY. Make memorable Thanksgiving decor with these step-by-step instructions.
Thanksgiving is all about warmth, gratitude, and creating unforgettable memories with loved ones. And what better way to infuse your home with the spirit of the holiday than by crafting your very own Pilgrim Gnomes? In this step-by-step guide, we will delve into the enchanting world of Pilgrim Gnome DIY and explore the art of making homemade Thanksgiving decorations. These charming little gnomes will not only add a touch of whimsy to your festivities but also create a unique and heartwarming atmosphere.
Pilgrim Gnome DIY | Thanksgiving Crafts Decorations
Pilgrim Gnomes are more than just decorations; they are enchanting characters that bring a sense of magic to your Thanksgiving celebrations. These bearded, pilgrim-clad figures are known for spreading joy and sparking conversations. Whether they are gracing your table or adorning your mantle, these little companions will surely capture hearts.
Crafting your Pilgrim Gnomes is an opportunity to express your creativity. You can customize them with various colors and sizes, ensuring they perfectly complement your Thanksgiving décor. The possibilities are as endless as your imagination.
This fall season, make up a few of these cute little autumn gnomes. They will look great decorating a holiday mantel, side table, or even as part of a centerpiece on your Thanksgiving table for Thanksgiving dinner. This easy DIY idea is the perfect keepsake for festive, homemade Thanksgiving holiday crafts and decorations. If you make enough, they can be holiday favors people take home! Tuck a name tag in the beard!
Tips and variations for making this Pilgrim gnome craft:
● Make sure your can is clean and dry.
● If you are worried about the Thanksgiving gnome being knocked over easily, you can fill the can part the way with rice or clean play sand.
● Change the colors using brown or black to make sweet little gnome brothers!
● You should be able to find many of the craft supplies at a dollar store.
● Materials for this pilgrim gnome can be purchased online or at your local JoAnn, Michaels, or Hobby Lobby.
Other cute gnomes crafts:
● Mardi Gras Gnome DIY (this guy is over-the-top!)
● St. Patrick’s Day Gnome DIY
● Bunny Gnome DIY
● Patriotic Gnome Decor DIY
● Graduation Gnome
● How to Make a Football Gnome Pin | DIY
● How to Make a Santa Gnome Ornament for Christmas Christmas Tree | No-Sew (holiday gnomes)
● Easy Snowman Gnome Craft Tutorial | No Sew
● Flower Pot Gnome DIY
Other homemade Thanksgiving crafts:
● Pilgrims Jar Craft
● Floral Horn of Plenty DIY
● Dollar Store Craft: Lighted Thanksgiving Centerpiece
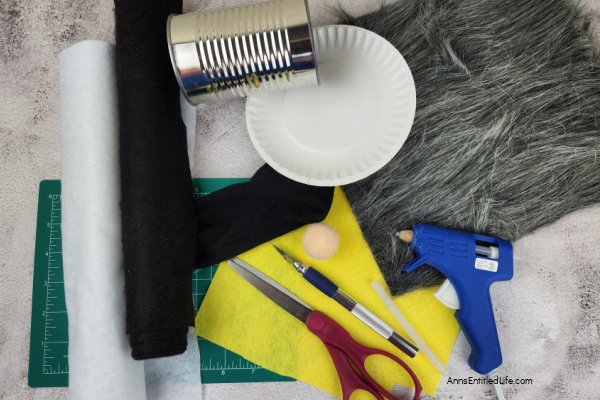
Pilgrim Gnome DIY Materials:
● Glue Sticks
● White Felt
● Black Felt
● Yellow Felt
● Clean Small Can
● Black Sock
● Gray Faux Fur
● Small Paper Plate (or another like object)
● Easter Egg Onion(used for nose; can also use large wood bead or pompom)
Pilgrim Gnome DIY Tools:
● Scissors
● Hot Glue Gun
● Exacto Knife
Pilgrim Gnome DIY Directions:
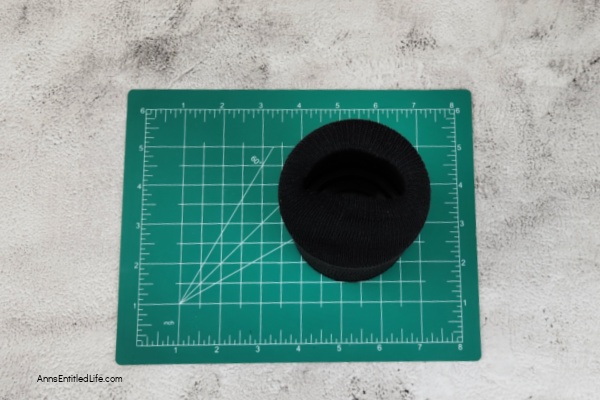
1. Put the sock on the can starting from the closed side of the can.
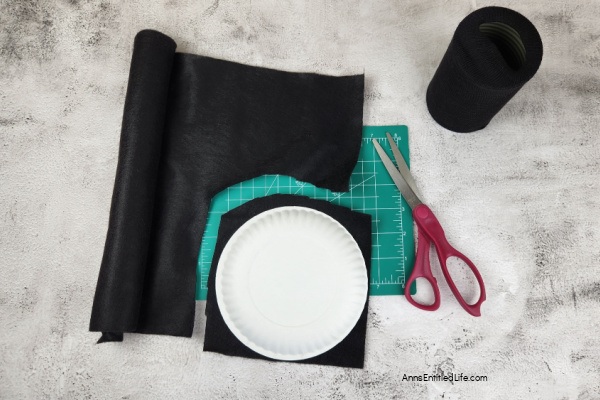
2. Next, place the plate on the black felt and cut out a piece as large as the plate. Then, cut around the plate to make a round black piece of felt.
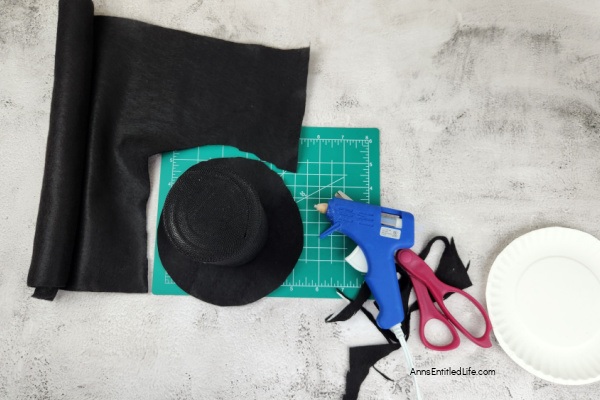
3. Now glue the open end of the can/sock into the center of the round felt.
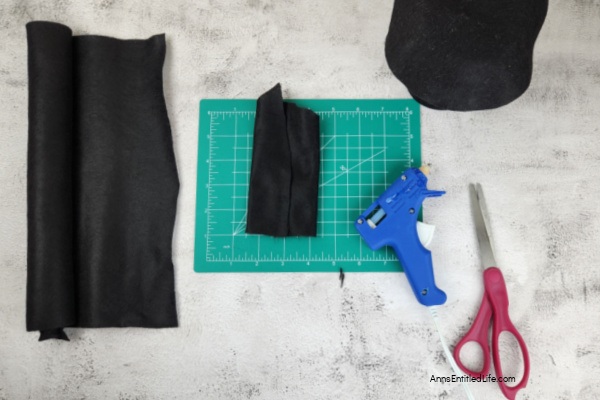
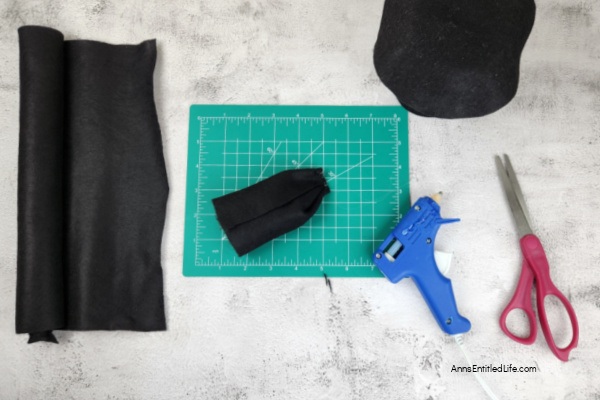
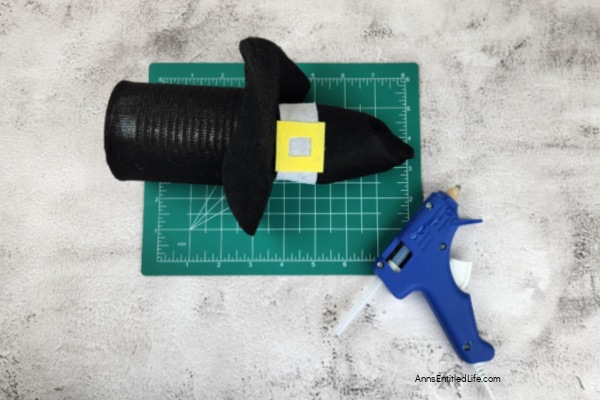
4. Next, cut a piece of black felt that is about 6 inches wide by about five inches long. Fold and glue the wide ends together. Trim off the end if there is rough edges.
5. At one end, carefully gather it together and glue it in place to close the end.
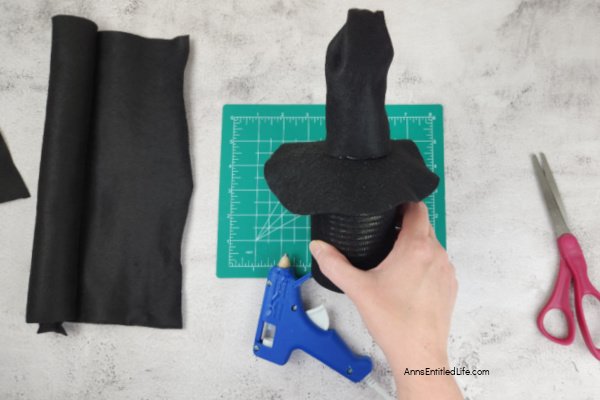
6. Now glue the open end on top of the round black felt. Try to get it as centered as you can.
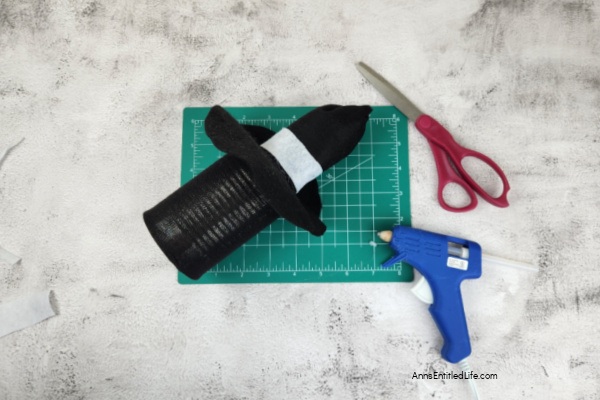
7. Cut a strip of white felt that is about 1 inch wide, and that will go all the way around the felt you just glued into place. Then, glue it in place right where the two pieces of felt meet.
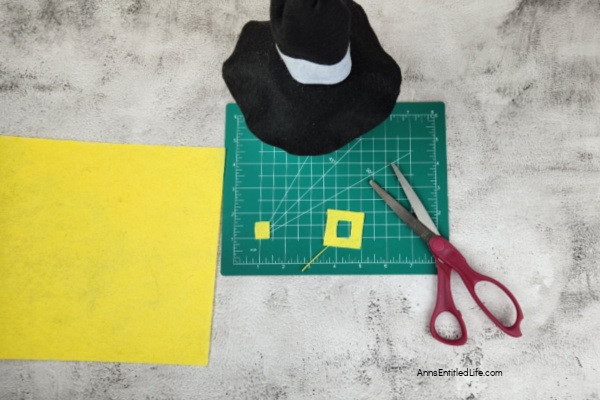
8. Cut a small square from the yellow felt that is just a little wider than the white felt. Then, cut an even smaller square out of the center of that square.
9. Glue the piece with the hole cut out in the center of the white strip of felt.
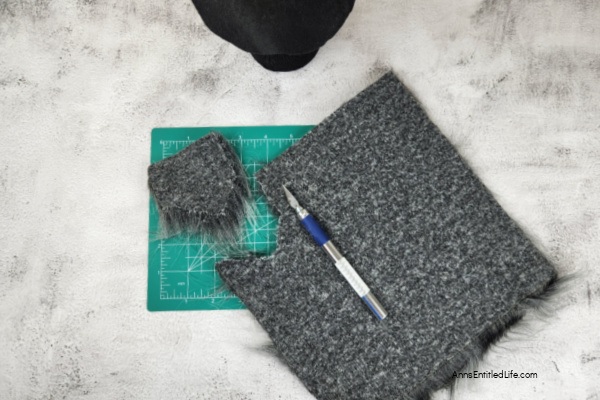
10. Now cut a piece of fur to fit about halfway around the can and so the fur just reaches the bottom of the can. It should be cut into somewhat of a V shape. I find it best to cut from the back with an exacto knife.
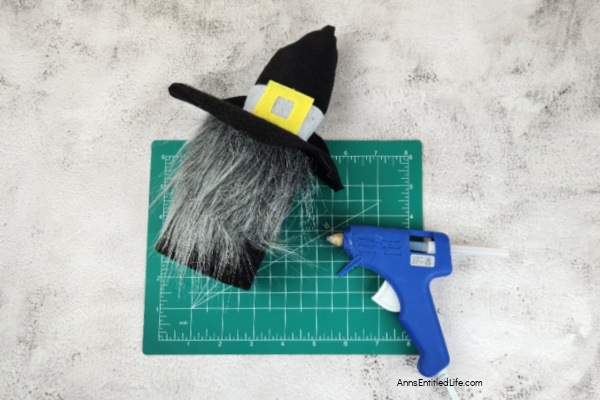
11. Glue that cut-out piece of fur onto the can just under the black felt and center of the yellow felt.
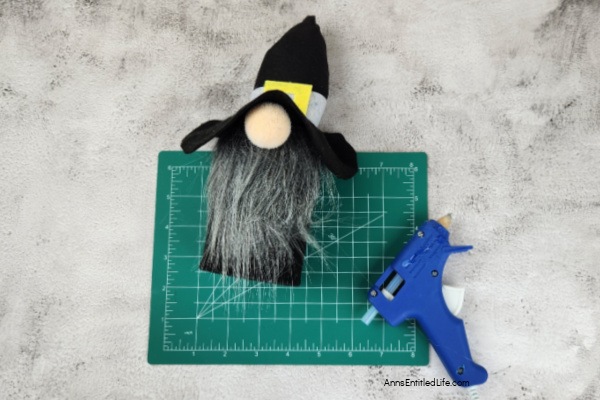
12. The last is to glue the nose on just over the fur under the black felt but also the center of the yellow piece of felt.
Pilgrim Gnome DIY | Thanksgiving Crafts Decorations
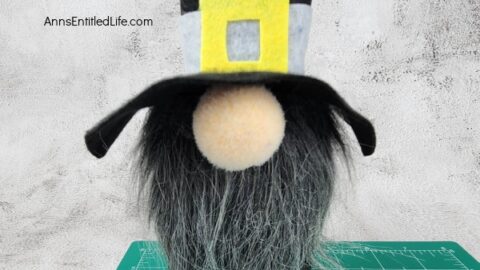
Create homemade Thanksgiving decorations with this Pilgrim Gnome DIY. Make memorable Thanksgiving decor with these step-by-step instructions.
Materials
- Glue Sticks
- White Felt
- Black Felt
- Yellow Felt
- Clean Small Can
- Black Sock
- Gray Faux Fur
- Small Paper Plate (or another like object)
- Easter Egg Onion (used for nose; can also use large wood bead or pompom)
Tools
- Scissors
- Hot Glue Gun
- Exacto Knife
Instructions
- Put the sock on the can starting from the closed side of the can.
- Next, place the plate on the black felt and cut out a piece as large as the plate. Then, cut around the plate to make a round black piece of felt.
- Now, glue the open end of the can/sock into the center of the round felt.
- Next, cut a piece of black felt that is about 6 inches wide by about five inches long. Fold and glue the wide ends together. Trim off the end if there are rough edges.
- At one end, carefully gather it together and glue it in place to close the end.
- Now glue the open end on top of the round black felt. Try to get it as centered as you can.
- Cut a strip of white felt that is about 1 inch wide and that will go all the way around the felt you just glued into place. Then, glue it where the two pieces of felt meet.
- Cut a small square from the yellow felt just a little wider than the white felt. Then, cut an even smaller square out of the center of that square.
- Glue the piece with the hole cut out in the center of the white strip of felt.
- Now cut a piece of fur to fit about halfway around the can and so the fur just reaches the bottom of the can. It should be cut into somewhat of a V shape. I find it best to cut from the back with an exacto knife.
- Glue that cut-out piece of fur onto the can just under the black felt and the center of the yellow felt.
- The last is to glue the nose on just over the fur under the black felt but also the center of the yellow piece of felt.
Recommended Products
As an Amazon Associate and member of other affiliate programs, I earn from qualifying purchases.
● For more crafts on Ann’s Entitled Life, click here.
● If you enjoyed this post, be sure to sign up for the Ann’s Entitled Life weekly newsletter, and never miss another article!


Kristin salazar says
Your gnome is adorable, thanks for sharing!