Bake a hearty, crusty rye bread at home with this easy rustic recipe. Perfect for beginners, this loaf delivers bold flavor and old-world charm with every slice.

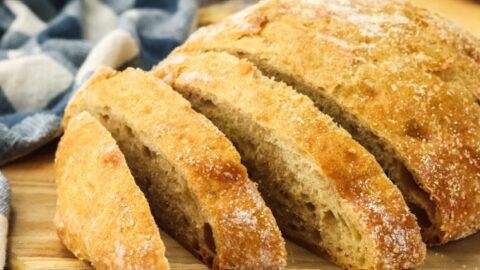
This artisan bread has a beautiful crusty outside and is beautifully fluffy and so airy on the inside. The rye flour gives this bread a gorgeous, earthy color, and the addition of the gluten gives your homemade rye bread beautiful air bubbles on the inside.
Easy Rustic Rye Bread Recipe | No-Knead
Baking bread is very easy in concept. However, many little variables and nuances can make a difference to your bread. To make bread rise, you need to cover it and keep it warm. My great-grandmother used to place her covered bread under her comforter in her bed! You might consider your UN-heated oven (if you have two ovens), your garage (in a hot climate), or your microwave. Many people leave their covered bread to rise on the kitchen counter.
Fresh bread smells and tastes divine. You can make this delicious homemade rye bread recipe with its distinctive taste without a sourdough starter, without a bread machine, and without using an electric mixer and dough hook. It is a no-knead bread, so it is easy for beginners to make, and will come out beautifully the first time you make it!
The earthy flavor of rye bread is perfect for breakfast toast, a grilled cheese sandwich, or croutons. The combination of light rye flour and different toppings results in a great rye bread recipe. A loaf of rye bread adds a great flavor profile to go with soups, too!

We moved to Florida a few years ago. The local grocery store does not carry small loaves of bread, and the sales down here are B1G1. I am one person eating bread (Hubby will have two pieces of a loaf), so commercially made bread was not only expensive, even with our super-cool bread box (an insulated box that sucks the air out – Hubby got one from a kickstarter campaign years ago) I was wasting a lot of bread being the only one eating it.

Hubby volunteered to try and make me bread. He started with a no-knead recipe from a cookbook, and then improved upon it while testing and refining until he came up with the recipe below. He makes me bread three-four times a month with this recipe, for the past 3+ years. It is economical compared to store-bought bread, easy-to-make, and oh so good! It is a delicious recipe that I hope you will try and enjoy as much as I do.

Tips and variations for making this rustic rye bread recipe:
● This is for a small loaf that is perfect for 2-3 people for several days and fits well in the 5-quart cast iron Dutch oven we usually use.
● Heat your water in the microwave for 45 seconds to a minute, and test with a thermometer. You do not want to kill the yeast. 100°–110°F is the ideal temperature for Active Dry Yeast. This is a great yeast 101!
● If you do not have bread flour and are using all-purpose white flour, add 1 cup + 6 Tablespoons + 1½ tablespoons gluten in place of the 1 cup + 7 tablespoons of bread flour. I STRONGLY urge you to use bread flour.
● Rye flour uses more gluten because it has less gluten than white flour to start with.

● You can use dark rye flour, but it will be a very dark bread. We once got a dark rye at the Russian store, and since we don’t speak or read Russian, we couldn’t read the package nuances. We ended up with a very dark rye flour, and boy, were those rye breads dark. I felt like I was eating pumpernickel – it was that dark. You might like that, however. If you prefer dark rye flour, there is no reason you cannot use it in place of light rye flour.
● This is powdered buttermilk. We keep it in the fridge and make as needed. We have this on hand all the time. You can buy it online, at your local Amish store (which is where we purchase it), or at your local grocery store, which may carry it.
● If you have difficulty finding vital wheat gluten, look for it in your local health food store or buy it on Amazon and get it the next day.
● If you let your yeast rise more, the inside of the bread will be fluffier.
● The more you fold the dough, the more fibrous it gets – forming it gives it more structure, more like a ball than a floppy flat bread.
● Putting the Cream of Wheat (or Wheat Bran or Cornmeal) on the clean cotton towel will allow it to stick to the bread. You can add more to the top of the loaf if you like.
● If you are using a convection oven, preheat to 450°F.
● The outside of the bread when baked will be dark or light depending on whether you use dark or light rye flour. The inside will be light and fluffy.
● This recipe is made with simple ingredients that are commonly found in the aisles of your local grocery store.
Other homemade bread recipes you might enjoy:
● Homemade Cinnamon Raisin Bread Recipe | Best + Easy
● Homemade White Bread Recipe
● Pumpkin Bread Braid Recipe | Best and Easy
● Strawberry Star Bread Recipe

Easy Rustic Rye Bread Recipe Ingredients:
● 1 teaspoon Sugar
● 1 cup Warm Water (110-110°F; use a thermometer)
● 1 teaspoon Instant Yeast (regular yeast, not fast-rising bread machine yeast)
● ½ cup Light Rye Flour
● 1 cup + 7 tablespoons Bread Flour
● 1 Tablespoon Vital Wheat Gluten
● 1 Tablespoon Buttermilk Powder
● 1 teaspoon Salt
● 2 Tablespoons Cream of Wheat, Wheat Bran, or Cornmeal
Easy Rustic Rye Bread Mise en Place:
● Large Mixing Bowl
● Medium Bowl
● Measuring Cup
● Measuring Spoons
● Thermometer
● 2 Silicone Spatulas or Rubber Spatula
● Flour Duster or small Sieve
● Plastic Wrap
● 2 Clean Cotton Dish Towels
● 5 – 6 quart Dutch Oven (heavy covered pot made of cast iron, enamel, Pyrex, or ceramic with a lid)
● Wire Baking Rack (Cooking Rack, Baking Rack, Wire Rack)

Easy Rustic Rye Bread Recipe Directions:
1. In a large bowl, dissolve sugar in water. The water must not be warmer than 110 degrees Fahrenheit, or you risk killing the yeast.

2. Once sugar is dissolved, add the yeast to the water. Let it sit for 10 minutes to let the yeast eat the sugar (the yeast blooms).

3. Add the flours and gluten to the yeast in the bowl. Then, on top of the flours, add the buttermilk powder and salt, stirring everything with a spatula until blended. (Do not add the buttermilk powder or salt directly into the water as it may adversely affect the yeast). Scrape off your spatula a couple of times as the dough will be shaggy and sticky (use one spatula to scrape the other spatula). Loosely cover the bowl with plastic wrap. Then put a dry, folded dish towel on top of that. Let the dough rest at least 8 hours, preferably 12 to 18 hours, at a warm room temperature, at least 80°F.
4. The dough is ready when its surface is dotted with bubbles.
5. Lightly flour a work surface and place the dough on it.

6. Remove the sticky dough from the bowl by working around the edges where the dough is in contact with the inside of the bowl with a floured spatula. You should be able to scrape out the dough with a minimal amount left behind.
7. Sprinkle a tablespoon of flour on top of the dough, press the flour into the dough with the spatula. (Hubby uses a baking sheet to contain the flour.)

8. Using a silicone spatula so you don’t get your hands all sticky, shape/stretch the blob of bread dough into a rectangle shape, and fold it over on itself. Fold it in half, then in thirds. Every time you fold the dough, sprinkle flour in the area you just folded from again (the dough is absorbing the flour on your work surface). Do this four to six times until your dough is no longer sticky.

9. Cover the rye dough loosely with plastic wrap and let it rest for about 15 minutes.
10. Wash and dry the bowl you used to mix the dough.

11. Using just enough flour to keep the dough from sticking to the work surface or your hands, gently shape it into a ball.
12. Generously sprinkle a clean cotton dish towel with cream of wheat, wheat bran, or cornmeal (approximately one tablespoon).

13. Put the seam side of the dough down on the towel and dust with more cream of wheat, wheat bran, or cornmeal.
14. Pick up the dough by picking up the four ends of the towel (it will look like a delivery stork delivering a baby) and place it in the clean bowl. While the dough is sitting on the towel inside the bowl, leave the towel sides to hang over the bowl so they do not stick to the dough inside.

15. Cover the top of the dough with a clean towel, remove to a warm place, and let the dough rise for approximately 2-3 hours. It should double in size. If it has not doubled at 2 hours, proof it for another hour.
16. Turn your oven on to 475°F and place your Dutch oven into the oven for 30 minutes.
17. When the dough is ready, carefully remove the Dutch oven from the oven (use potholders as it will be very hot) and place on a hot resistant flat surface (put a pot holder or baking sheet on your counter before placing the Dutch oven down).
18. Slide your hand under the towel and turn the dough over into the pot to release it from the towel. The dough will lose its shape a bit in the process when it lands in the Dutch oven. Give the Dutch oven a firm shake or two to help distribute the dough evenly.

19. Cover and bake for 25-30 minutes. Remove the lid and bake another 10-15 minutes, until the loaf is beautifully browned. (If you add 5 minutes at the end, the crust will be harder.)

20. Remove the bread from the Dutch oven and let it cool on a wire rack for about 1 hour before slicing with a sharp knife.
Easy Rustic Rye Bread Recipe | No-Knead
Easy Rustic Rye Bread Recipe | No-Knead. Bake a hearty, crusty rye bread at home with this easy rustic recipe. Perfect for beginners, this loaf delivers bold flavor and old-world charm with every slice.
Ingredients
- 1 teaspoon Sugar
- 1 cup Warm Water (110-110°F; use a thermometer)
- 1 teaspoon Instant Yeast (regular yeast, not fast-rising bread machine yeast)
- ½ cup Light Rye Flour
- 1 cup + 7 tablespoons Bread Flour
- 1 Tablespoon Vital Wheat Gluten
- 1 Tablespoon Buttermilk Powder
- 1 teaspoon Salt
- 2 Tablespoons Cream of Wheat, Wheat Bran, or Cornmeal
Instructions
- In a large bowl, dissolve the sugar in water. The water must not be warmer than 110 degrees Fahrenheit, or you risk killing the yeast.
- Once sugar is dissolved, add the yeast to the water. Let it sit for 10 minutes to let the yeast eat the sugar (the yeast blooms).
- Add the flours and gluten to the yeast in the bowl. Then, on top of the flours, add the buttermilk powder and salt, stirring everything with a spatula until blended. (Do not add the buttermilk powder or salt directly into the water as it may adversely affect the yeast). Scrape off your spatula a couple of times as the dough will be shaggy and sticky (use one spatula to scrape the other spatula). Loosely cover the bowl with plastic wrap. Then put a dry, folded dish towel on top of that. Let the dough rest at least 8 hours, preferably 12 to 18 hours, at a warm room temperature (at least 80°F).
- The dough is ready when its surface is dotted with bubbles.
- Lightly flour a work surface and place the dough on it.
- Remove the sticky dough from the bowl by working around the edges where the dough is in contact with the inside of the bowl with a floured spatula. You should be able to scrape out the dough with a minimal amount left behind.
- Sprinkle a tablespoon of flour on top of the dough, press the flour into the dough with the spatula. (Hubby uses a baking sheet to contain the flour.)
- Using a silicone spatula so you don't get your hands all sticky, shape/stretch the blob of bread dough into a rectangle shape, and fold it over on itself. Fold it in half, then in thirds. Every time you fold the dough, sprinkle flour in the area you just folded from again (the dough is absorbing the flour on your work surface). Do this four to six times until your dough is no longer sticky.
- Cover the rye dough loosely with plastic wrap and let it rest for about 15 minutes.
- Wash and dry the bowl you used to mix the dough.
- Using just enough flour to keep the dough from sticking to the work surface or your hands, gently shape it into a ball.
- Generously sprinkle a clean cotton dish towel with cream of wheat, wheat bran, or cornmeal (approximately one tablespoon).
- Put the seam side of the dough down on the towel and dust with more cream of wheat, wheat bran, or cornmeal.
- Pick up the dough by picking up the four ends of the towel (it will look like a delivery stork delivering a baby) and place it in the clean bowl. While the dough is sitting on the towel inside the bowl, leave the towel sides to hang over the bowl so they do not stick to the dough inside.
- Cover the top of the dough with a clean towel, remove to a warm place, and let the dough rise for approximately 2-3 hours. This is the second rise. It should double in size. If it has not doubled at 2 hours, proof it for another hour.
- Turn your oven on to 475°F and place your Dutch oven into the oven for 30 minutes.
- When the dough is ready, carefully remove the Dutch oven from the oven (use potholders as it will be very hot) and place it on a heat-resistant flat surface (put a pot holder or baking sheet on your counter before placing the Dutch oven down).
- Slide your hand under the towel and turn the dough over into the pot to release it from the towel. The dough will lose its shape a bit in the process when it lands in the Dutch oven. Give the Dutch oven a firm shake or two to help distribute the dough evenly.
- Cover and bake for 25-30 minutes. Remove the lid and bake another 10-15 minutes, until the loaf is beautifully browned. (If you add 5 minutes at the end, the crust will be harder.)
- Remove the bread from the Dutch oven and let it cool on a wire rack for about 1 hour before slicing with a sharp knife.
Recommended Products
As an Amazon Associate and member of other affiliate programs, I earn from qualifying purchases.
-

 Le Creuset Enameled Cast Iron Signature Round Dutch Oven, 5.5 qt., Cerise
 -
 Mueller 6qt Enameled Cast Iron Dutch Oven, Heavy-Duty Casserole and Braiser Pan with Lid and Knob, Safe for All Cooktops, Aqua Blue
 -
 Caraway Enameled Dutch Oven - 6.5 qt Cast Iron Dutch Oven With Lid - 3 Layer Enamel Coating - No Seasoning Required - Compatible With All Stovetops - Oven Safe - No Forever Chemicals - Charcoal
Nutrition Information:
Yield:
10Serving Size:
1Amount Per Serving: Calories: 109Total Fat: 1gSaturated Fat: 0gTrans Fat: 0gUnsaturated Fat: 1gCholesterol: 0mgSodium: 222mgCarbohydrates: 23gFiber: 4gSugar: 1gProtein: 5g
Note: for exact nutritional information, consult your dietitian. All nutritional information provided is simply a guideline.

● For more recipes on Ann’s Entitled Life, click here.
● If you enjoyed this post, be sure to sign up for the Ann’s Entitled Life weekly newsletter, and never miss another article!
Leave a Reply