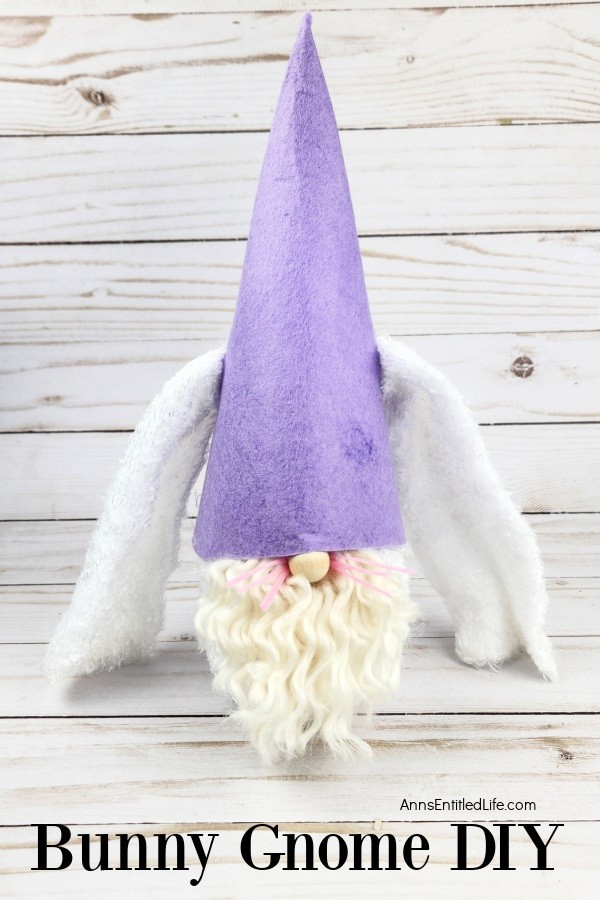
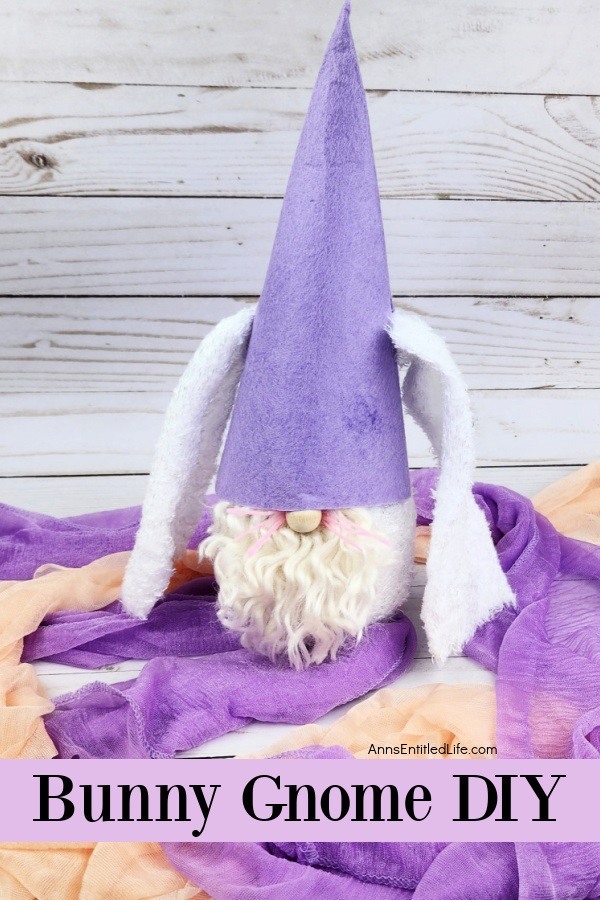
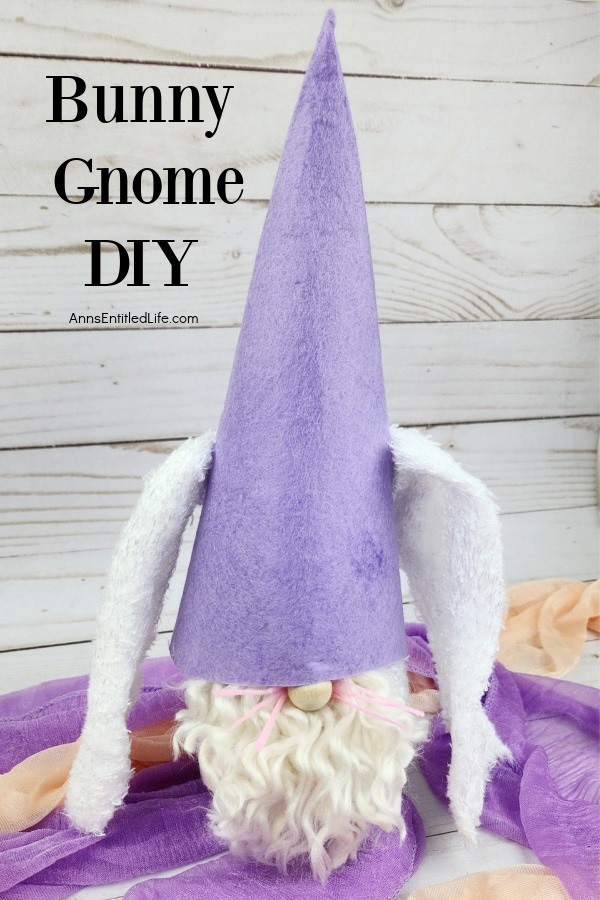
If you are looking for an adorable bunny craft project that is sure to bring a smile to your face, then look no further than the bunny gnome DIY. This easy-to-follow tutorial will show you how to create a sweet little bunny gnome out of felt and other basic materials. This is perfect for adding some charm and whimsy to any room in your house.
Looking for a creative and fun project to do at home? Why not make your own bunny gnome!? With just a few simple materials and some imagination, you can create an adorable little gnome that will be the perfect addition to any enclosed outdoor space. Great spring decor. These diy bunny gnomes aren’t suitable for the garden or outdoor weather.
Bunny Gnome DIY
These little gnomes are super cute for Easter decor and Easter decorations. Whether you are looking for the perfect gift for someone special or want to show off your creative side, this adorable bunny gnome is sure fun to make. You can make one bunny gnome or a dozen bunny gnomes, personalize and change them to be unique, and make them for every day or as Easter bunny gnomes. You can make a bunch of these cute little guys in under an hour. These are sock gnomes, not bottle gnomes, so they are not toppers.
With Easter just around the corner, it’s time to get creative and crafty! If you’re looking for a fun way to celebrate the holiday, why not try making your own Easter gnome? This project is easy to make and perfect for kids of all ages. Plus, you can customize each one with different colors and materials. With just a few supplies and some basic instructions, you can create an adorable Easter Bunny Gnome that will bring smiles to everyone who sees it!
Tips and variations for making this homemade bunny gnome:
● Instead of rice for your sock, you could also use lentils, corn seeds, beans, or play sand.
● Lavender was used for this hat, but you could use a different color, such as pink, blue, light green, purple, etc.
Fuzzy socks come in many colors and textures. Choose the one you like best, but not ankle socks.
● You should be able to find all craft supplies at a dollar store, other than the hot glue gun.
● Materials for this Irish gnome can be purchased online or at one of your local craft stores: JoAnn, Michaels, or Hobby Lobby.
Try these easy bunny crafts:
● No Sew Sock Bunny (this is one of my most popular crafts!)
● Easter Bunny Garland (Easter crafts)
● Easter Bunny Mason Jar Craft (Easter craft)
Other little gnome crafts:
● Mardi Gras Gnome DIY (this guy is over-the-top!)
● St. Patrick’s Day Gnome DIY
● Patriotic Gnome Decor DIY
● Graduation Gnome
● How to Make a Football Gnome Pin | DIY
● Pilgrim Gnome DIY
● How to Make a Santa Gnome Ornament for Christmas Christmas Tree | No-Sew (holiday gnomes)
● Easy Snowman Gnome Craft Tutorial | No Sew
● Flower Pot Gnome DIY
Bunny Gnome DIY Materials:
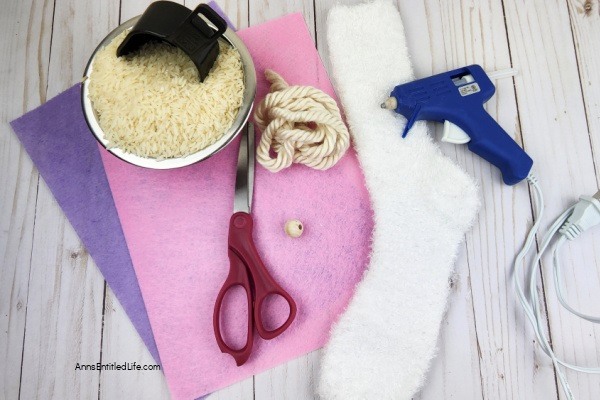
● 1 White Fuzzy Sock
● 2 Hot Glue Sticks
● 2 Cups Rice
● 1 8×12 Sheet Felt (used lavender)
● 1 Small Sheet of Pink Felt
● White Fuzzy Yarn or Fake Fur
● 1 Small Wood Bead
Bunny Gnome DIY Tools:
● Scissors
● Hot Glue Gun
Bunny Gnome DIY Directions:
1. Carefully add the rice to the sock. You can do this by scooping it in or using a funnel to dump it in.
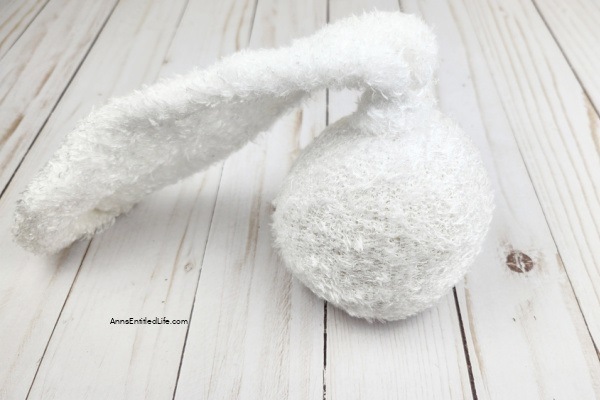
2. Pick the fuzzy sock up so all the rice goes to the bottom and makes a ball shape. Then tie the sock in a knot right at the top of the rice line.
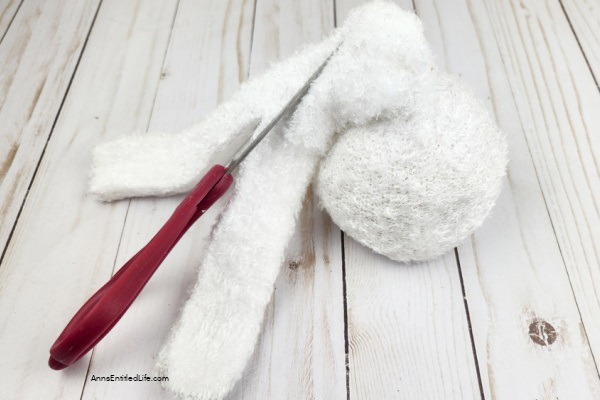
3. Take the scissors and cut the other end of the sock right down the middle and stop just before the knot. This will make our ears.
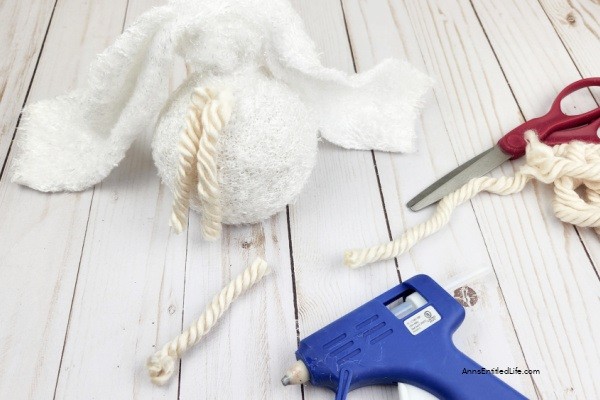
4. Cut pieces of yarn that reach from the knot to the bottom of the filled sock. Then glue them in place just under the knot on one side. I used 5 pieces of yarn.
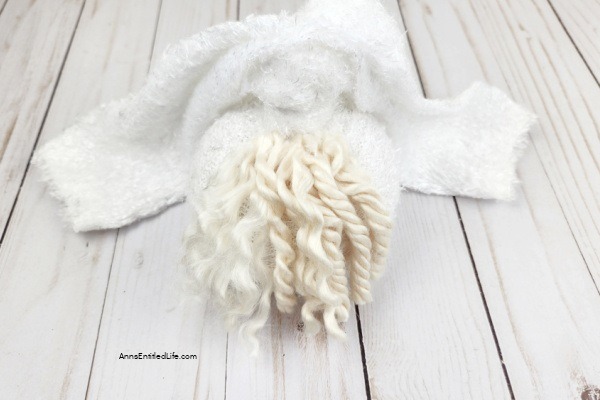
5. Carefully untwist the yarn so that it gets fuzzy and looks more like hair.
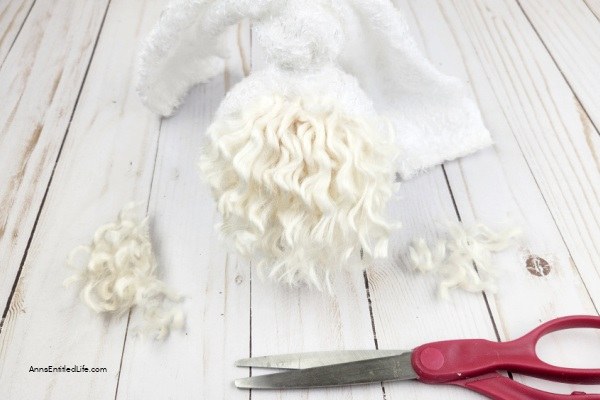
6. Take the scissors and trim off the sides of the yarn/hair and excess material so that it shapes the beard that you want.
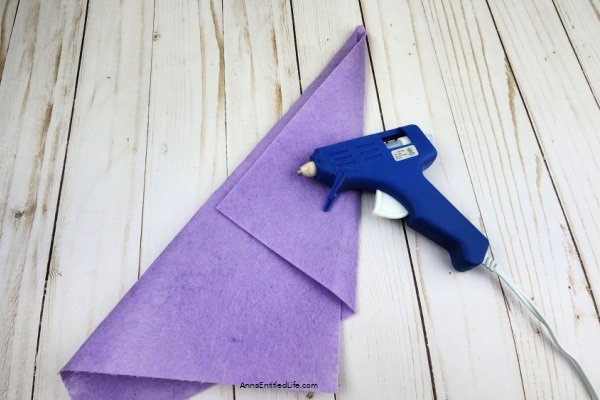
7. Using the purple sheet of felt, fold/roll it into a cone shape and glue it in place.
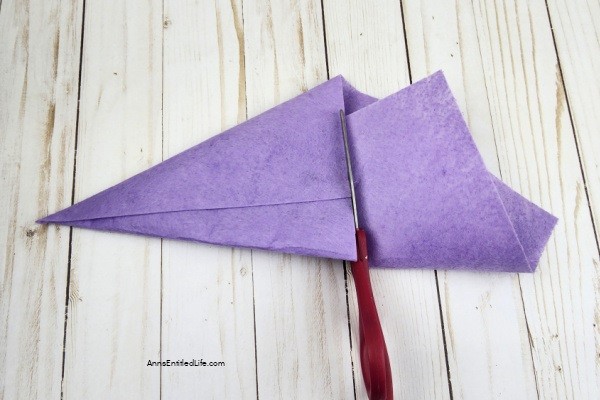
8. Take the scissors and trim the felt so that the bottom of the cone is even.
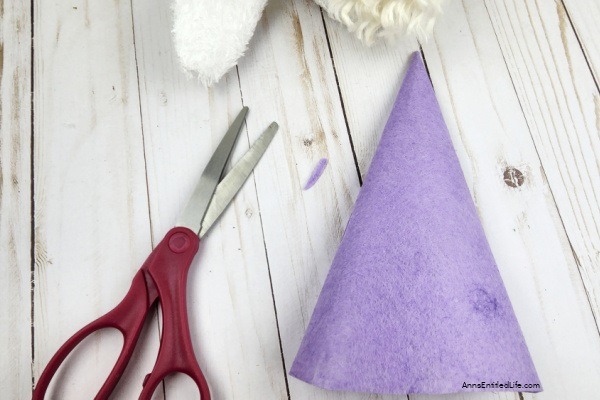
9. Lay the felt cone flat with the seam in the back. Now take the scissors and trim a small hole on each side about the middle way of the cone.
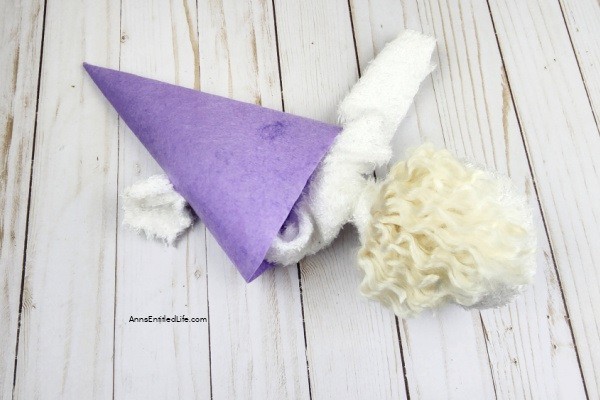
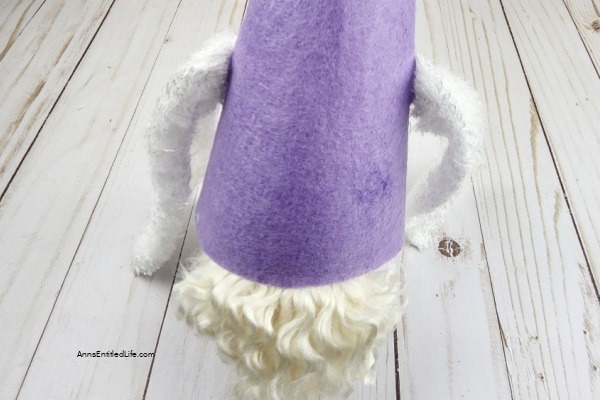
10. Place a bunny ear through each of those holes and pull until the bunny ears are pulled through and the cone is sitting on the bunny’s body.
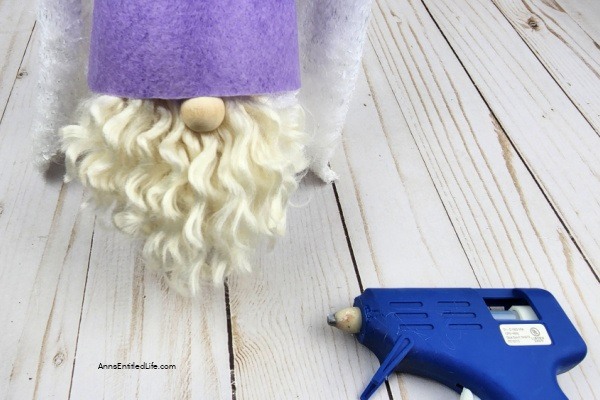
11. Glue the hat/cone to the body and glue the wood bead in the center of the gnome beard. Place the bead so that it is slightly under the gnome hat.
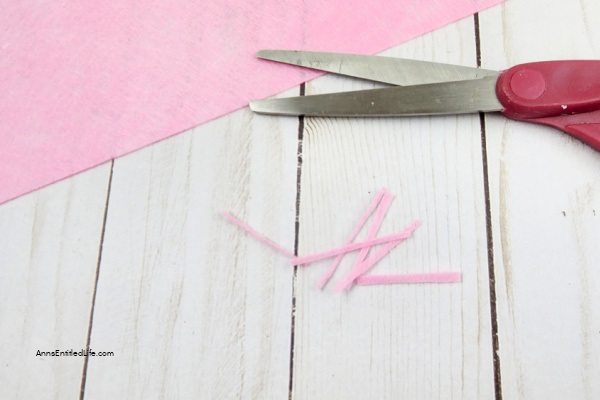
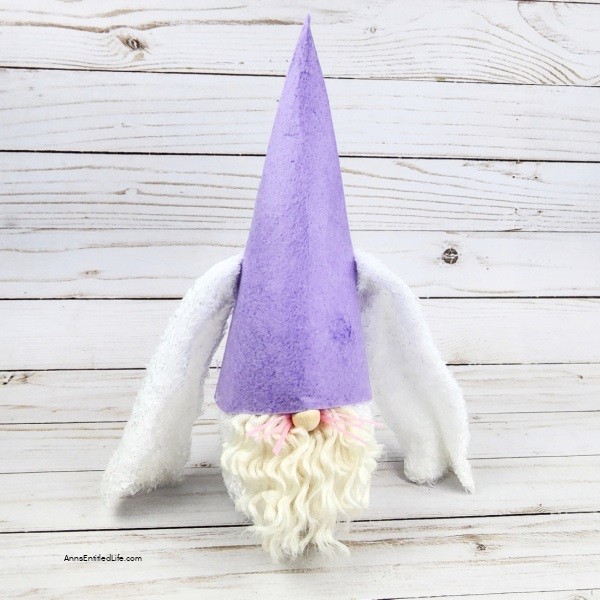
12. Cut a few small strips of pink felt and glue them to each side of the wood bead to form whiskers.
13. Display as desired.
Bunny Gnome DIY

Bunny Gnome DIY. If you are looking for an adorable bunny craft project that is sure to bring a smile to your face, then look no further than the bunny gnome DIY. This easy-to-follow tutorial will show you how to create a sweet little bunny gnome out of felt and other basic materials. This is perfect for adding some charm and whimsy to any room in your house.
Materials
- 1 White Fuzzy Sock
- 2 Hot Glue Sticks
- 2 Cups Rice
- 1 8x12 Sheet Felt (used lavender)
- 1 Small Sheet of Pink Felt
- White Fuzzy Yarn or Fake Fur
- 1 Small Wood Bead
Tools
- Scissors
- Hot Glue Gun
Instructions
- Carefully add the rice to the sock. You can do this by scooping it in or using a funnel to dump it in.
- Pick the fuzzy sock up, so all the rice goes to the bottom and makes a ball shape. Then tie the sock in a knot right at the top of the rice line.
- Take the scissors and cut the other end of the sock right down the middle and stop just before the knot. This will make our ears.
- Cut pieces of yarn that reach from the knot to the bottom of the filled sock. Then glue them in place just under the knot on one side. I used 5 pieces of yarn.
- Carefully untwist the yarn so that it gets fuzzy and looks more like hair.
- Take the scissors and trim off the sides of the yarn/hair and excess material so that it shapes the beard that you want.
- Using the purple sheet of felt, fold/roll it into a cone shape and glue it in place.
- Take the scissors and trim the felt so that the bottom of the cone is even.
- Lay the felt cone flat with the seam in the back. Now take the scissors and trim a small hole on each side about the middle way of the cone.
- Place a bunny ear through each of those holes and pull until the bunny ears are pulled through, and the cone is sitting on the bunny's body.
- Glue the hat/cone to the body and glue the wood bead in the center of the gnome's beard. Place the bead so that it is slightly under the gnome hat.
- Cut a few small strips of pink felt and glue them to each side of the wood bead to form whiskers.
- Display as desired.
Recommended Products
As an Amazon Associate and member of other affiliate programs, I earn from qualifying purchases.
-
 Lillian Vernon Stained Glass Easter Egg Ornaments - Holiday Home Decor, Spring Themed Tree Decorations, 1 _ Inches x 2 Inches, 4 Colors, Set of 12
 -
 SuQKXCo Easter Bunny Door Sign Welcome Wreath for Front Door Decoration Door Hanger Sign 12 Inch Welcome Wood Wreaths Rustic Wall Hanging Farmhouse Porch Window Decor Indoor Outdoor
 -
 Easter Hanging Bunny Ornaments Set of 10, Colorful Plush Bunny Gnomes Easter Gnomes Tree Ornament Decorations
● For more crafts on Ann’s Entitled Life, click here.
● If you enjoyed this post, be sure to sign up for the Ann’s Entitled Life weekly newsletter, and never miss another article!



Jennifer Wise says
So super cute! My sister loves gnomes! This is darling. Visiting from the Wonderful Wednesday Blog Party.