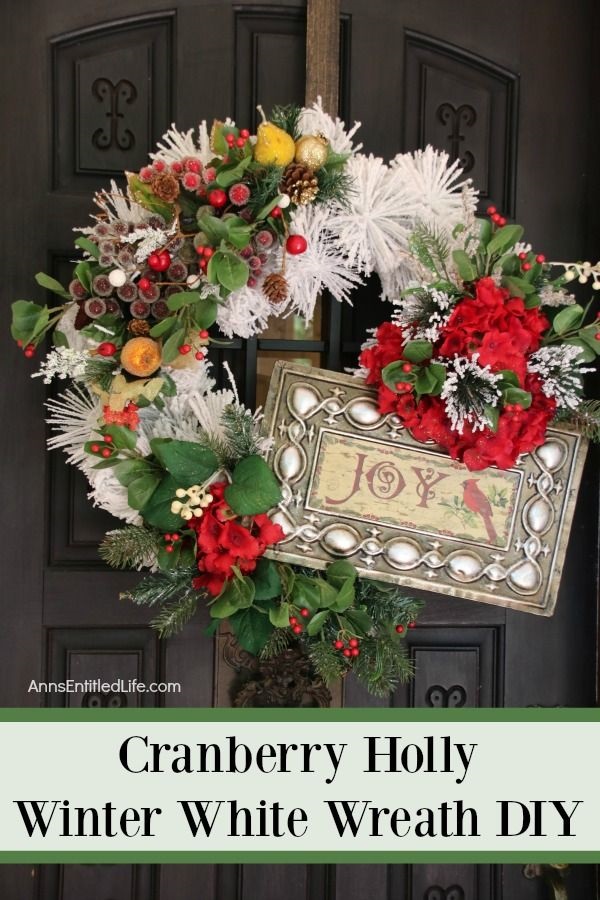
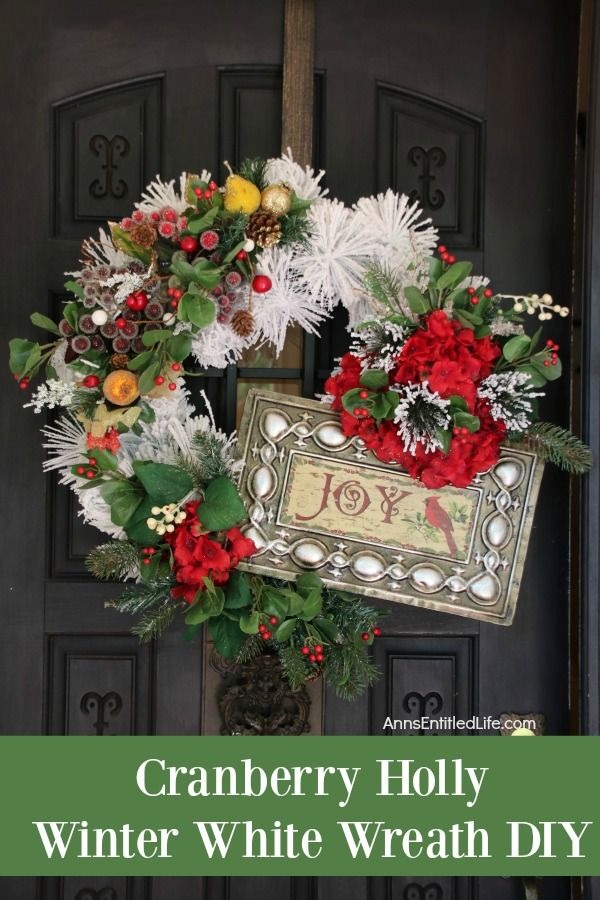
This beautiful Cranberry Holly Winter White Wreath is a simple rustic wreath that appears time-consuming but actually comes together in under 30 minutes! Follow these easy step by step directions to make your own lovely custom Christmas door hanger wreath.
Cranberry Holly Winter White Wreath DIY
While I wrote this up to be a Christmas wreath for a door, it would also be fabulous over the fireplace. You may want to up the size of it though – depending on the side of your fireplace mantel – to make it stand out.
The focus point of this wreath is the holiday sign. The cascade of berries is to offset the focal point making it less one-sided. This wreath aims for “snowiness” (yes, that is now a word), but it is not a snow-wreath.
Tips and variations for making this Cranberry Holly Winter White Wreath DIY wreath:
● Make certain to match the size of your wreath to the door or area where it will be hung. A 36″ wreath on a 30″ door will not work. Likewise, a 24″ wreath over your fireplace mantel will probably be lost.
● Take a look at Halloween clearance sales too, as many times you can find white wreaths there for 50-75% off!
● On that note, also take into account the sign to wreath ratio. You want something substantial, but not too overwhelming.
● This wreath uses a holiday sign as the focus point. You could also use a different object as your focus point: a stuffed reindeer or moose, a small birdcage, a Christmas tree topper, Santa or Mrs. Claus, a large partridge – anything that is a holiday season focus. In other words, you can gear this toward your holiday theme!
● If you plan on hanging this wreath from just after Thanksgiving through most of the winter, consider your focus point to be more generic… that is where a stuffed moose or moose sign would work very well!
● This wreath is frosted, not sparkly. If you choose to add sparkle, make it one or two touches of sparkle – such as the picks used. The sparkle on the picks will pick up the light. There will always be a small sparkle that is picked up from light (even if only streetlights).
● This is a door hanger wreath, it does not really lend itself to a ribbon for hanging. Since rustic does not always do ribbon “well” if you need a ribbon to hang, consider a red plaid one. No bow on this wreath either.
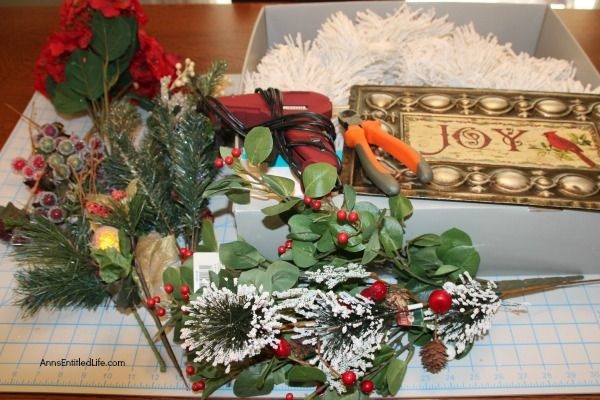
Cranberry Holly Winter White Wreath DIY Materials:
● 1 White Wreath
● 1 Holiday Sign (focus point)
● 2 picks Floral Fruit
● 1 Geranium Bush
● 3 picks Holly Berries
● Greenery
● Hot Glue Sticks
● Floral Wire (optional)
Cranberry Holly Winter White Wreath DIY Tools:
● Glue Gun
● Wire Cutters
Cranberry Holly Winter White Wreath DIY Directions:
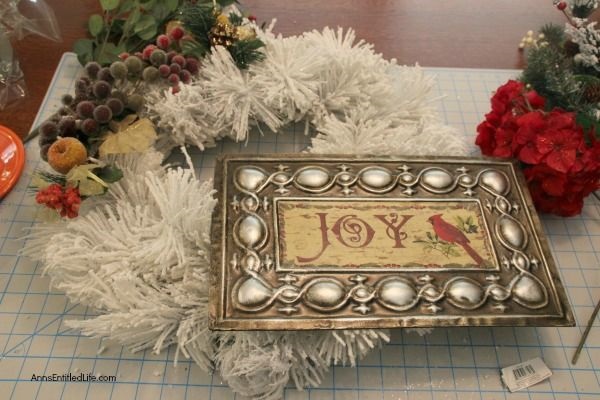
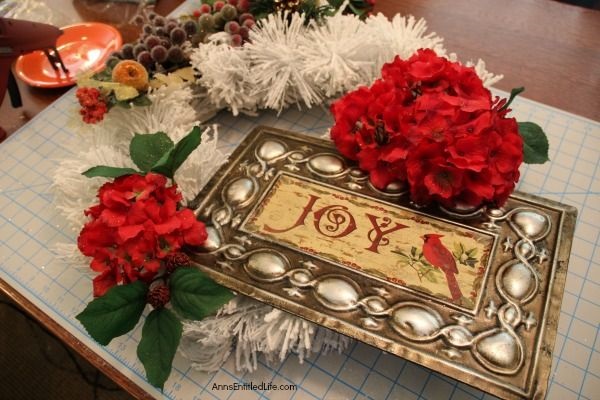
● Position the sign (or whatever you are using as your focus) on the wreath. This is offset on the center, and “we” (the royal we because my niece had the idea, I’m just the running commentary and photographer) decided lower right. If you would like lower left because that works better for where you plan on hanging this finished wreath, that works too!
● Hot glue or wire in place. If you are going to wire, make sure you loop the floral wire through the hanger on the back of your sign, and through the wire on your wreath. Pretend you are weaving or sewing. Pull tight for less movement. You may also want to wire AND hot glue for stiffer placement, especially if your sign is heavy.
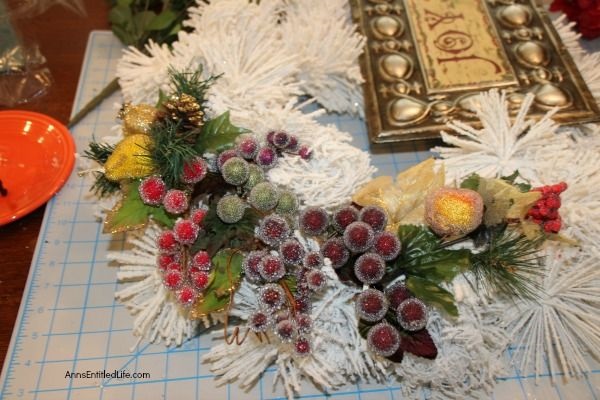
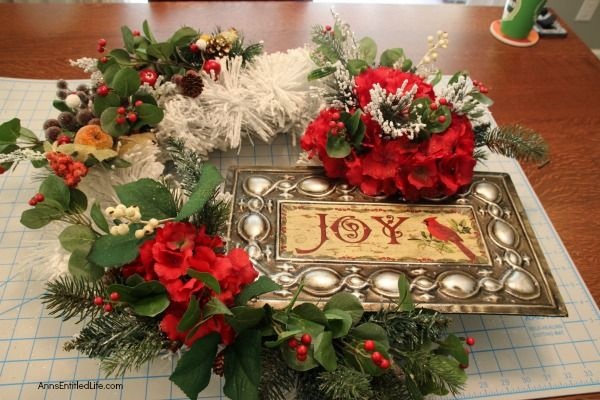
● The berries are being used to balance against the focus point you are creating. That sign (+ flowers you will be adding) is BIG. If you left it by itself on the wreath, it would be a lotta white, and a big old sign. You need something to break it up, hence the berry trail.
● Remember when hot gluing the berries in place that you are layering and adding leaves (intermingling greens) not lumping them together. Overlaying your berries, leaves, and picks will make the wreath look better.
● The reason geraniums were chosen as the flower for this wreath is because they are large. The sign is the focus point (I may have mentioned that before), and the geraniums are actually going to make that focus point a GIANT focus point that cannot be missed. Clip the geraniums, and place two large portions of the clippings (either one large, or two smaller) on either side of the focus point. Hot glue in place. Pull through some of the wreath branches into the geraniums for a slight break-up, and to show the wreath underneath.
● Two large flower features are set so as not to have 4-5 smaller features pulling your eyes in all directions. Breaking up the geraniums is key – this wreath needed color, but you don’t want it to be a big blob of color that slaps you in the er, eye.
● Once you have layered the berries (always do a dry run before hot gluing), and have added some greenery, use the picks to add some interest and conceal any holes which may show.
● Tuck away any wire you may have used, and move the wreath pines over bare spots.
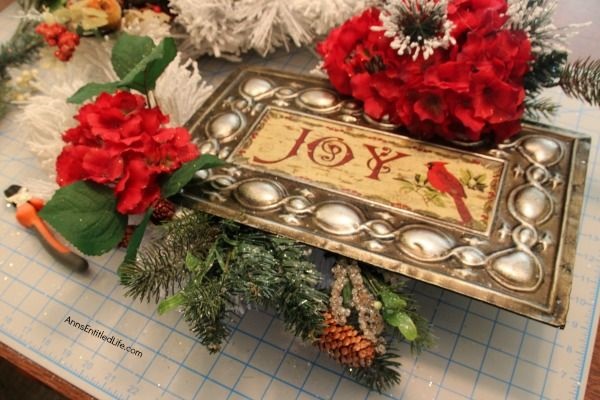
● Things looked a little bare under the sign, so some greenery was added underneath and hot glued in place.
● Take a step back from the wreath. Make sure all the holes are covered either by twisting greenery over an open space or repositioning a white pine from the wreath.
● Give your wreath a light shake to make certain everything is well placed either via wire or hot glue.
That’s it. This is a super simple, but showy Christmas wreath. It looks simply fabulous!
Cranberry Holly Winter White Wreath DIY

Cranberry Holly Winter White Wreath DIY. This beautiful Cranberry Holly Winter White Wreath is a simple rustic wreath that appears time-consuming, but actually comes together in under 30 minutes! Follow these easy step by step directions to make your own lovely custom Christmas door hanger wreath.
Materials
- 1 White Wreath
- 1 Holiday Sign (focus point)
- 2 picks Floral Fruit
- 1 Geraniums Bush
- 3 picks Holly Berries
- Greenery
- Hot Glue Sticks
- Floral Wire (optional)
Tools
- Glue Gun
- Wire Cutters
Instructions
- Position the sign (or whatever you are using as your focus) on the wreath. This is offset on the center, and "we" (the royal we because my niece had the idea, I am just the running commentary and photographer) decided lower right. If you would like lower left because that works better for where you plan on hanging this finished wreath, that works too!
- Hot glue or wire the sign into place. If you are going to wire, make sure you loop the floral wire through the hanger on the back of your sign, and through the wire on your wreath. Pretend you are weaving or sewing. Pull tight for less movement. You may also want to wire AND hot glue for stiffer placement, especially if your sign is heavy.
- The berries are being used to balance against the focus point you are creating. That sign (+ flowers you will be adding) is BIG. If you left it by itself on the wreath, it would be a lotta white, and a big old sign. You need something to break it up, hence the berry trail.
- Remember when hot gluing the berries in place that you are layering and adding leaves (intermingling greens) not lumping them together. Overlaying your berries, leaves, and picks will make the wreath look better.
- The reason geraniums were chosen as the flower for this wreath is because they are large. The sign is the focus point (I may have mentioned that before), and the geraniums are actually going to make that focus point a GIANT focus point that cannot be missed. Clip the geraniums, and place two large portions of the clippings (either one large, or two smaller) on either side of the focus point. Hot glue in place. Pull through some of the wreath branches into the geraniums for a slight break-up, and to show the wreath underneath.
- Two large flower features are set so as not to have 4-5 smaller features pulling your eyes in all directions. Breaking up the geraniums is key – this wreath needed color, but you do not want it to be a big blob of color that slaps you in the er, eye.
- Once you have layered the berries (always do a dry run of placement before hot gluing), and have added some greenery, use the picks to add some interest and conceal any holes which may show.
- Tuck away any wire you may have used, and move the wreath pines over bare spots.
- Things looked a little bare under the sign, so some greenery was added underneath and hot glued in place.
- Take a step back from the wreath. Make sure all the holes are covered either by twisting greenery over an open space or repositioning a white pine from the wreath.
- Give your wreath a light shake to make certain everything is well placed either via wire or hot glue.
- That’s it. Now hang as desired. This is a super simple, but showy Christmas wreath. It looks simply fabulous!
Recommended Products
As an Amazon Associate and member of other affiliate programs, I earn from qualifying purchases.
-
![[30 Inch Artificial Christmas Wreath] - Scarlet Hydrangea Collection - Red and Gold Decoration - Pre Lit with 50 Warm Clear Colored LED Mini Lights - Includes Remote Controlled Battery Pack with Timer](data:image/svg+xml,%3Csvg%20xmlns=%22http://www.w3.org/2000/svg%22%20viewBox=%220%200%20240%20240%22%3E%3C/svg%3E) [30 Inch Artificial Christmas Wreath] - Scarlet Hydrangea Collection - Red and Gold Decoration - Pre Lit with 50 Warm Clear Colored LED Mini Lights - Includes Remote Controlled Battery Pack with Timer
[30 Inch Artificial Christmas Wreath] - Scarlet Hydrangea Collection - Red and Gold Decoration - Pre Lit with 50 Warm Clear Colored LED Mini Lights - Includes Remote Controlled Battery Pack with Timer -
 Vintage Aqua Pink Christmas Holiday Ornament Wreath
 -
 Darby Creek Trading Christmas Cashmere - Red Rose, White Magnolia, Ornament & Lotus Pod Pre Lit LED Front Door Christmas Wreath
If you enjoy making holiday wreaths, you may want to make one of these:
● Candy Cane Wreath DIY Tutorial – Make your own no-sew Candy Cane wreath using these easy step by step instructions. This cute holiday decor is perfect for Christmas, Valentine’s Day, or any day! Simple and inexpensive to make, this easy Candy Cane Wreath DIY Tutorial will show you how to add a marvelous touch of whimsy to your holiday decor.
● The Grinch Inspired Wreath DIY Tutorial – A beautiful Mr. Grinch inspired wreath sure to make even the coldest heart burst! This step by step tutorial is complete with (free) pdfs for the hat and heart for you to print and make exact. This wreath will look great on your front door, over your mantel, or on a wall. Truly unique holiday decor!
● Snowflake Bead Wreath Craft DIY – This is a beautiful snowflake wreath that is perfect for door decor in the chilly winter months. You can fully customize this snowflake bead wreath for color, and ornaments. Simple to make, this lovely Snowflake Bead Wreath Craft is a real conversation piece.
● For more Craft posts on Ann’s Entitled Life, click here.
● If you enjoyed this post, be sure to sign up for the Ann’s Entitled Life weekly newsletter, and never miss another article!







![[30 Inch Artificial Christmas Wreath] - Scarlet Hydrangea Collection - Red and Gold Decoration - Pre Lit with 50 Warm Clear Colored LED Mini Lights - Includes Remote Controlled Battery Pack with Timer](https://m.media-amazon.com/images/I/616vnouATLL._SL500_.jpg)


Leave a Reply