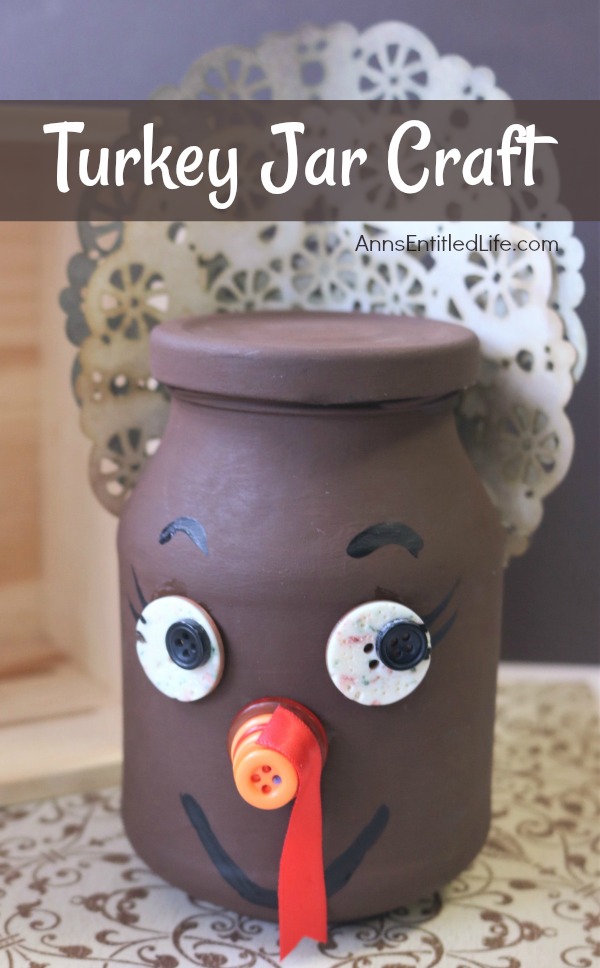
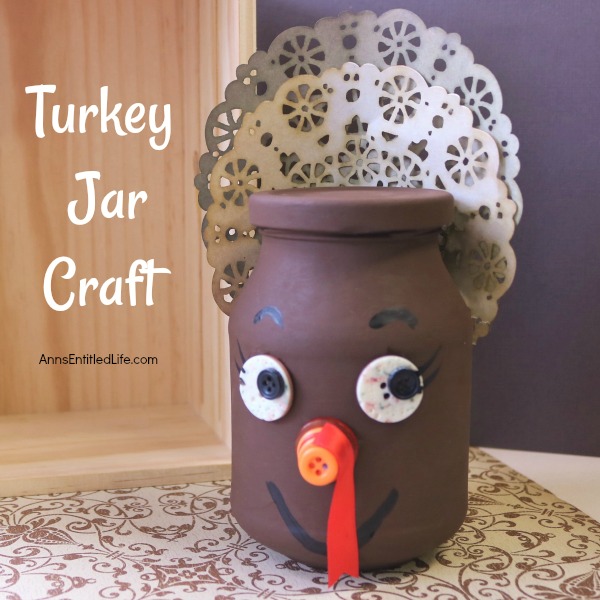
Make your own adorable Turkey jar craft. This easy step by step tutorial will show you how to easily make a turkey out of a condiment jar that is perfect for a centerpiece, mantel decor or table decorations this Thanksgiving! If you are looking for an easy to make Thanksgiving craft project, this is it!
You can make this large or small. Use a small glass jar, like a salsa or maraschino cherry jar, or a mayo jar for a larger turkey. Make one for each setting, and fill it with chocolates to allow your guests to take home a Thanksgiving dinner memento. Or, make one large turkey and several smaller ones for a centerpiece or mantel set.
Thanksgiving Turkey Jar Craft
If you would like to make more Thanksgiving day crafts here are a few to consider:
● Floral Horn of Plenty DIY – this. is. gorgeous. My photos do not do it justice, but it is sitting in my foyer right now, and I smile every time I look at it – it is that beautiful.
● Dollar Store Craft: Lighted Thanksgiving Centerpiece – this is lovely, and everything was purchased at a dollar store making it a very inexpensive craft!!
● Easy Thanksgiving Wreath DIY – some simple door decor!!
● Turkey Wine Glass DIY – these little gobblers are adorable!
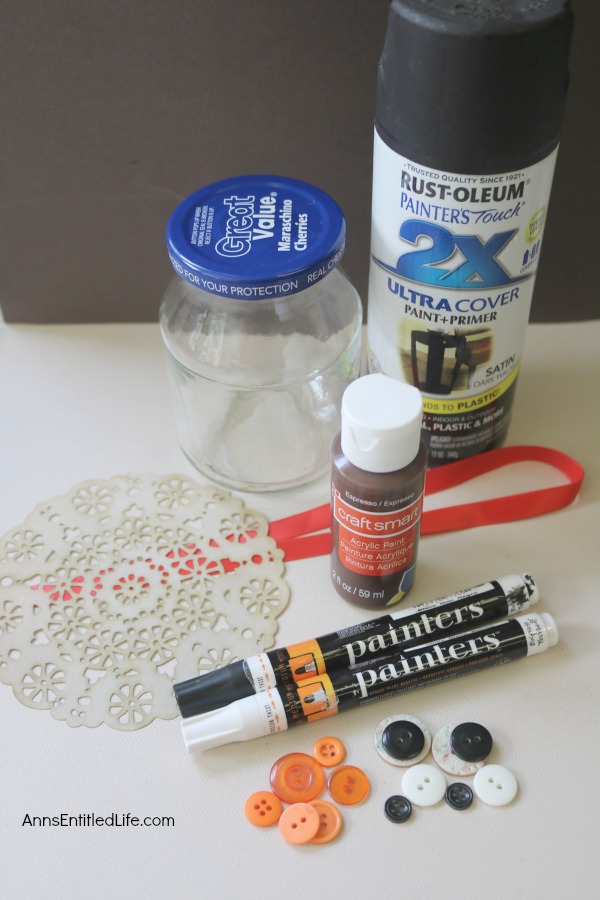
Thanksgiving Turkey Jar Craft Materials:
● 1 Glass Jar with lid
● Black Spray Paint Matte Finish
● Black Acrylic Paint
● Brown Acrylic Paint
● Paint Palette or Paper Plate
● 1″ to 2″ Paintbrush
● Paper Towels
● Water Cup
● Pencil
● Paint Markers in black (or you can use the black acrylic with a thin, tiny brush instead)
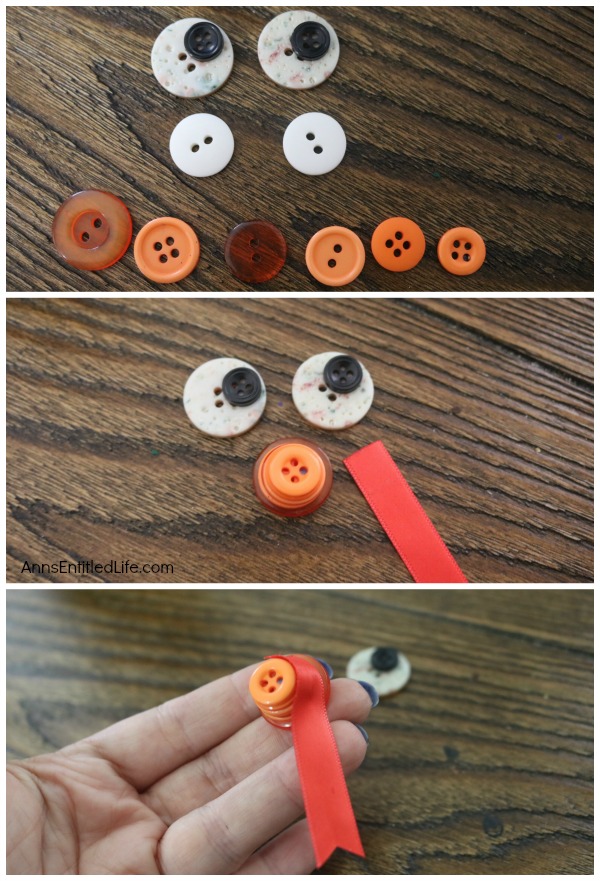
● Buttons for the eyes and beak in matching set for eyes and varied sized of orange for beak
● 2 Round Paper Doilies
● Red Ribbon
● Goop, Super Glue or Glue Gun (and Hot Glue Sticks)
● Scissors
Thanksgiving Turkey Jar Craft Directions:
● Clean jar and lid well; allow to dry.
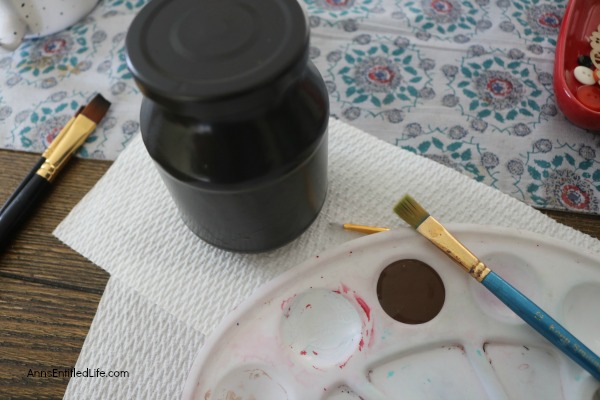
● Spray paint jar and lid with black spray paint. Spray a little inside of the top edge of the jar too to give the option of displaying without the lid (for something like pens or pencils).
● Allow to dry (about 30 minutes), repeat.
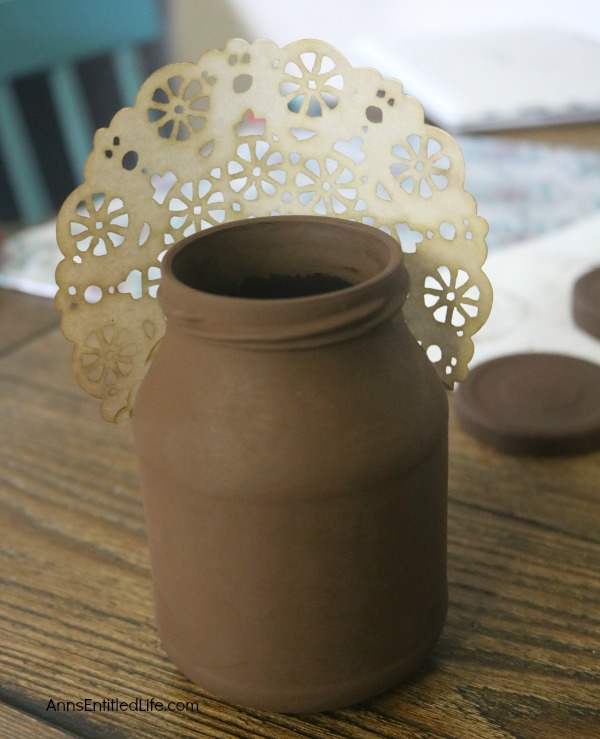
● Paint the entire jar with brown acrylic paint. One coat should be enough since you have a black base coat. If you desire a second coat of brown paint, allow the first coat of brown paint to dry completely, and paint a second coat.
● Once the brown paint is completely dry, attach your doilies to make the tail feathers. Use two doilies of a similar shade and place one slightly below the other to give a layered look. Add glue along the bottom edges on the doily and also some on the jar. Carefully press down and hold the doily in place until it is well set.
● Arrange the face buttons. These are layered for depth and interest. Start with a large white-ish button as the base, then layer a black button on top of the eye.
● For the beak, go from largest to smallest and glue them carefully on top of each other.
● Cut a length of red ribbon for the wattle.
● Glue the buttons on. Choose where exactly you want them to go, and lay them on, but then just glue on one at a time. Hold the button in place, pressing down to let the glue set up. Repeat the process until all the buttons are on.
● Glue the ribbon on to the beak and secure it by holding it down a minute as well.
● Next, add the turkey smile, eyelashes, and eyebrows by either using the black paint marker or a thin brush with the acrylic paint.
● Let that dry as well.
● Double check for any loose buttons, ribbon or doilies, and make sure your brown paint job is complete!
● Allow everything to dry, display as you like!
● Disclosure: the links in this post may be affiliate links.
● For more Craft posts on Ann’s Entitled Life, click here.
● If you enjoyed this post, be sure to sign up for the Ann’s Entitled Life weekly newsletter, and never miss another article!

Leave a Reply