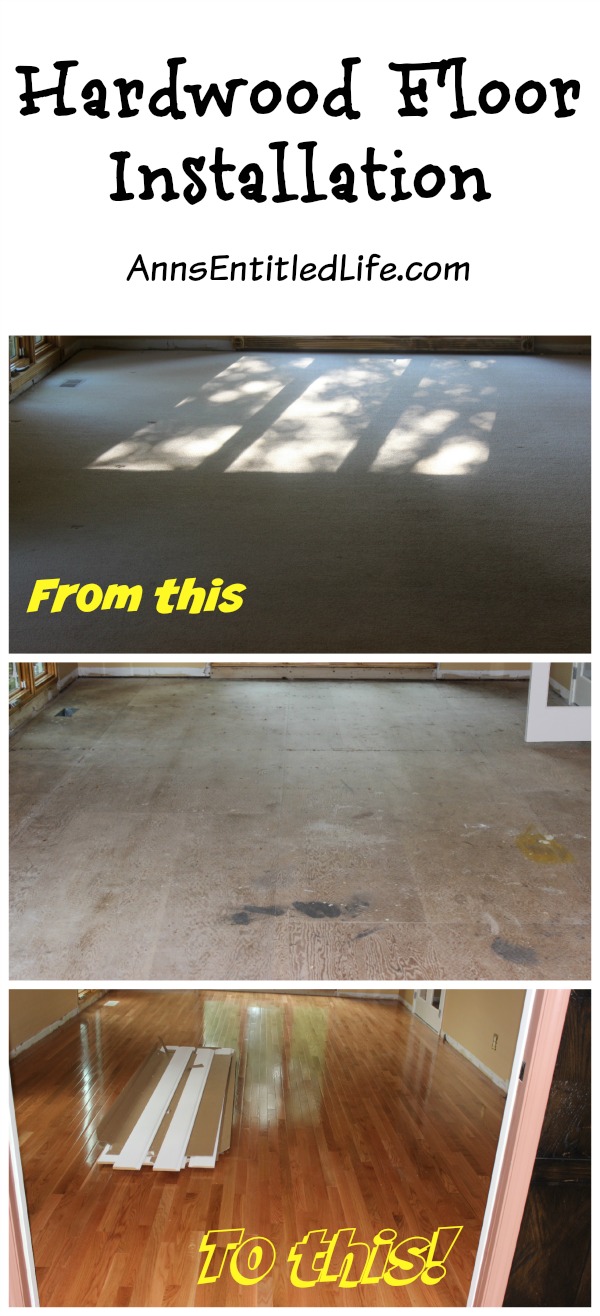
Hubby and I have a long list of renovations we (that is the royal “we” as much of this is being contracted out) hope to have done to our home this year. Tops on the home renovation list was hardwood floor installation in our living room, family room, and Hubby’s office.
Before any work on the floors could begin, Hubby and I had a lot of prep work to do. Our first decision was what flooring to put down in these room. When I say I researched this project for years I am not kidding. Dark? Light? Stained? Satin? High Gloss? Site-finished? Pre-finished? What type of wood? Manufacturer? These were just some of the decisions I had to make. I wanted these floors for years, but I knew what a mess site-finishing would be… even dustless sanding produces a fair amount of dust! Waiting for the color to dry plus three coats of poly… it looked like Max was going on vacation as I decided on the very traditional white oak, site finished, natural (no stain) in a satin finish. This decision came about because I did not want bevels in the wood floors, and bevels are what you get with pre-finished wood.
I second-guessed myself a dozen times over the years… I can live with the bevels, no I can’t, yes I can … I had many such conversations with myself all in the hopes of avoiding a site finish.
Hubby finally implored me to make up my mind this spring, and so I decided bevels it would be. But as I made that choice, I decided I would just take “one last look” around the internet to see if there was another option. Hubby was also hunting for me – he knew how long I had put this off due exclusively to bevels, and if there was any other option out there he wanted to find it and make me happy.
I don’t know which of us discovered it (I think it was Hubby), but we stumbled upon a square edge hardwood floor from Armstrong. Square edge means no bevels… it is perfectly flat and smooth just like a site finished floor, but with the positives of pre-finishing at a plant. After a bit more research we found a display at our local Home Depot in the color we would like, and ran over there to give it a look.
HURRAY!! This was exactly what I had been looking for! Hubby got online and did a search for a supplier. We had a firm start date from our installer, and we needed the wood in the house a few days prior to acclimate. Remember: whenever you are installing wood flooring you need it to sit in your house at room temperature for several days before installation. This applies to raw wood as well as pre-finished wood.
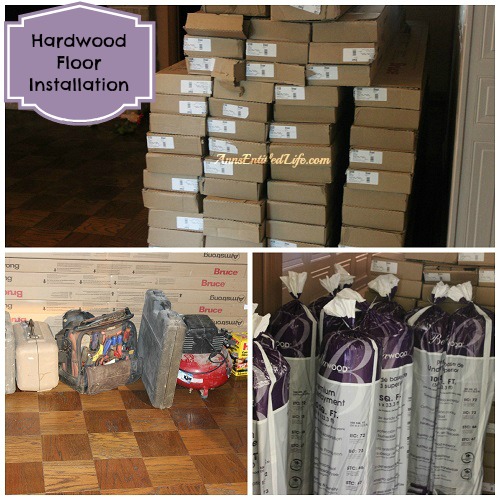
We ended up purchasing from AffordaFloors.com (link removed, site no longer exists) They were very reasonably priced, and could guarantee delivery a week out. While they didn’t have enough to ship immediately, they called the mill and confirmed there would be another run in the color we chose, and they could get it delivered by June 12th which gave the floors a full week of acclimation. We ordered 1100 sq ft to account for 10% waste. This product was so good though, that our installer had almost no waste (he couldn’t believe how fabulous this Bruce by Armstrong product was), and Hubby has enough wood flooring from the leftovers to do a small floor in one of his rentals! Still, 10% for waste is always advisable so take that into account when ordering hardwood flooring.
The floors arrived via a truck, and were unloaded into the garage. Hubby and Sonny-boy brought them in the house that evening.
We decided on a heavy-duty underlay. Everyone Hubby spoke to told us the Bellawood Premium Underlayment from Lumber Liquidators was overkill, but an excellent product. Because of floor squeaks we decided to buy it anyway. And were extremely happy we did! More on that in part 3.
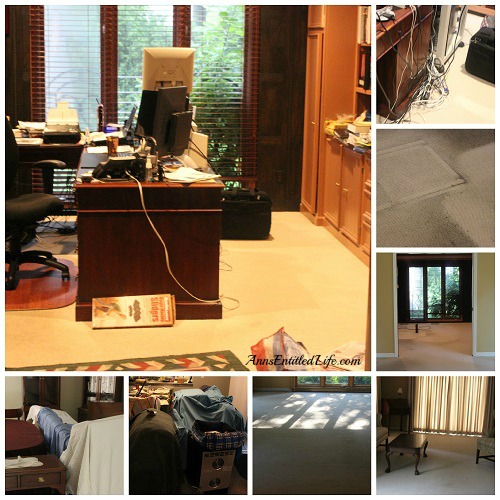
Now with all the hardwood flooring and underlay ordered, we had to empty the living room and Hubby’s office. The family room could wait a few days before we emptied. Thank goodness! When we finally have all three rooms empty, I felt as if I were living in a rabbit warren.
We have 10 rooms in our house, and one was being painted at the same time. Of the nine remaining rooms, three were eventually empty and five were packed with furnishings.
As we emptied the rooms, Hubby saw just how disgusting the carpeting was – especially in his office! We are a shoes on household, and shoes plus white carpet do not mix!
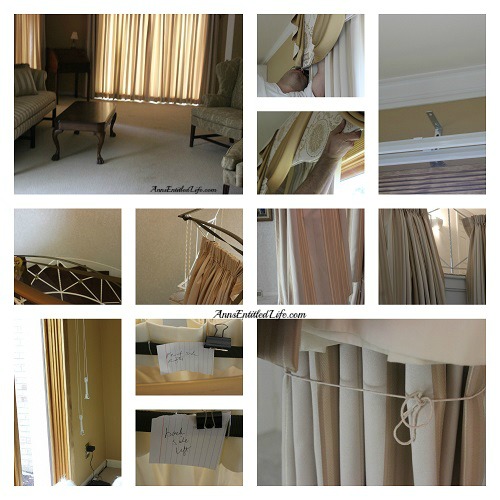
One dilemma we had was where to put the living room draperies. Hubby’s office has wooden blinds, so they stayed up. The family room has fabric covered plastic blinds, and they had to stay up – I have no idea how to remove those! But, the draperies in the living room had to be removed. Not only were they too long to stay up, the amount of dirt generated was just too much to try and vacuum out of the valences or draperies, so down then came!
Since ironing and steaming are about as low on the chore-chart as anything can go in my opinion, and the last thing I wanted was to wrinkle these drapes; I knew I wanted to be careful with storage. When we brought them down, Hubby and I folded them according to the pleats, and then tied the bottoms. We first placed them on the covered coach, when Hubby got the bright idea to hang them from the staircase railing!
Perfect solution!
We have a funky 1970s railing that is very open. You would never see anything like this installed today -and it is on the replace list for the winter when we are in Florida – but for now its funky-openness served our purposes well!
We hung the heavy drapery directly on the railing. Since these weigh a ton, we wanted the weight supported. Hubby got out a cargo tie-down and ratcheted it across the circular railing at the top of the landing. On this we hung the sheers. I marked each one with a piece of paper and paper-clipped it to the corner so I would remember what went were. Front, right side, back left side – all were clearly marked!
The valences we set atop the bed in the spare bedroom. At the bottom of the hung-from-the-railing-draperies, I folded each piece along the pleats, and then tied them loosely with a string. They dangled like this for weeks, but they did not wrinkle!
Rehanging the draperies took me under an hour! it was so easy to do because they were basically hanging on a clothesline, and with everything marked there was no mistaking what belonged where!
For Hubby and I the prep work was our biggest contribution to this project. Oh we ended up doing the shoe-molding and painting casing and base-molding – well, Hubby did. Hmmm maybe I should say this was most of the prep work that I did? Hubby did do more. But for the most part we were done and the installer took over from here. The next few days will be posts on that process.
Part 2, tomorrow’s post, has to deal with the carpet removal, prep and installation in the living room and office.
See also:
● Hardwood Floor Installation Part 1
● Hardwood Floor Installation Part 2
● Hardwood Floor Installation Part 3
● Hardwood Floor Installation Part 4
● If you enjoyed this post, be sure to sign up for the Ann’s Entitled Life weekly newsletter, and never miss another article!
● For more Renovation projects on Ann’s Entitled Life, click here.


[email protected] says
We will be working on our floors in the winter. Thanks for the great tips so far.
Ann says
Stay tuned, Saidah… the good, the bad and the ugly are yet to come. 🙂
Ann
Shell says
So nice you found just the product you wanted! Your lack of waste not only says it is a good product, it says your installer is very good at measuring and cutting. Congrats on finding a skilled installer.
Ann says
Shell tomorrow I sing our installer’s praises. I’d recommend him to anyone.
Ann