Yesterday, I explained all the preparation that went into planning and ordering of a hardwood floor for in-home installation. One of the key components was who was going to install the floor? It never entered hubby’s or my mind that we would do it ourselves. We had long suspected the home shows were full of hooey with their “easy installation” and *poof* it is done editing! And after all was said and done on this hardwood floor installation, our thoughts were proved correct.
Hubby has rental properties, and when he needed a finishing project, he was referred to Keenan Kelly. Hubby is extremely meticulous, and he felt Keenan was even worse – if attention to detail on a home renovation can be considered a “worse”. 😉 We brought Keenan in, received a reasonable quote, and hired him. He gave us a start date he stuck to, and we were so well pleased that when this project was done, we hired him to replace our banister while we are in Florida this winter.
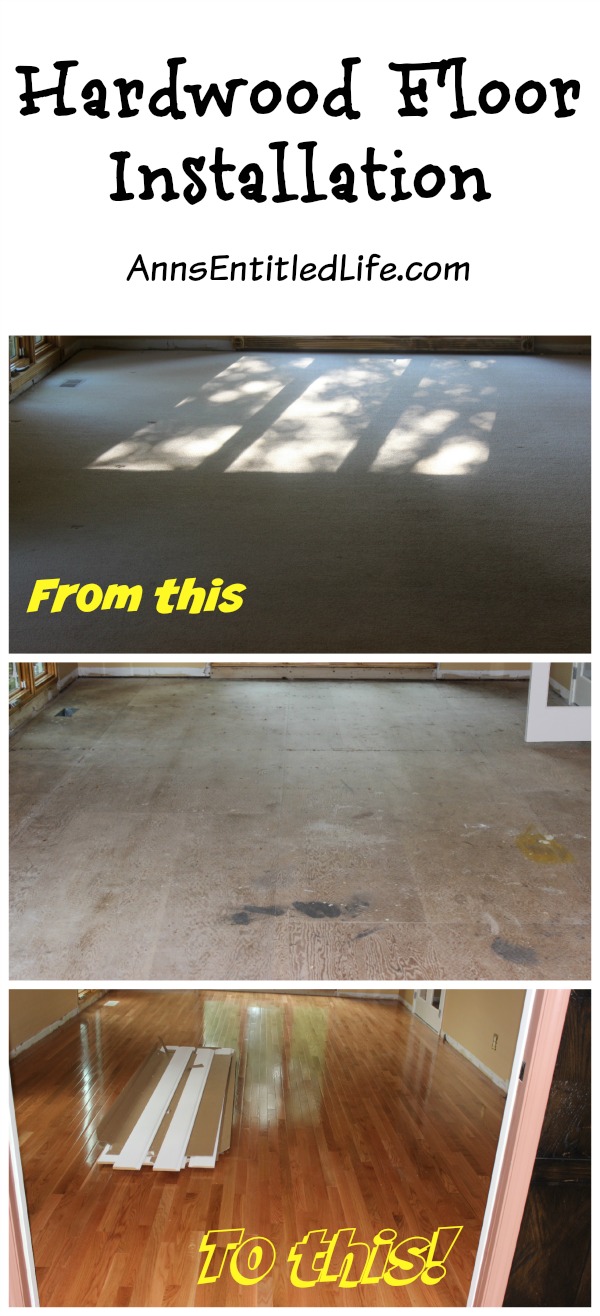
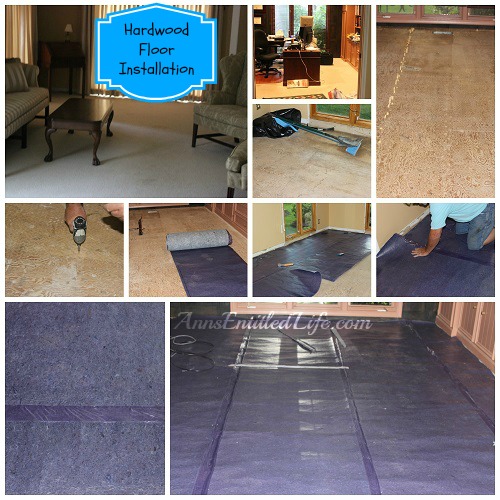
While we were away,Kennan removed the carpet, and the nail strips, nails, and staples. He said there must have been at least six carpets over the years, and when one carpet is removed, none of the staples or nails are removed… the carpet guys just install over the old ones! Now with all those nails and staples, you’d have thought our floors would have been pretty sound and felt nice and tight… nope, the floors squeaked and squeaked and squeaked and squeaked beneath that carpet! There was no sneaking up on anyone in our living room or Hubby’s office! Keenan spent an entire day screwing down the old floorboards every six inches!
Now, not only to the floors feel stable (they felt “tighter” immediately, even on the plywood), but there aren’t anymore squeaks! We are thrilled!!!
Kennan removed the molding around the living room windows. Hubby hated what I had installed 6-7 years ago, and we decided to match what was in the rest of the house instead. A plain 3 1/2″ Colonial molding that Hubby painted white, was installed after the floors were put in.
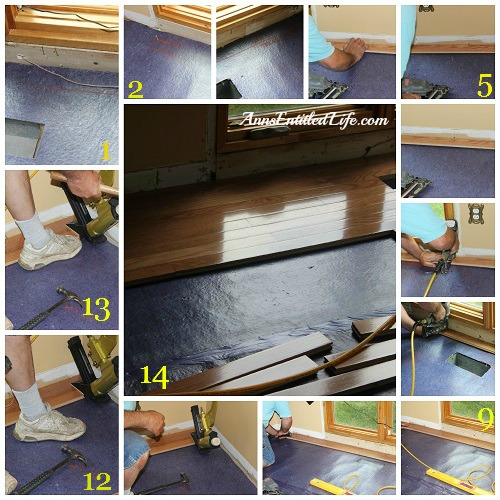
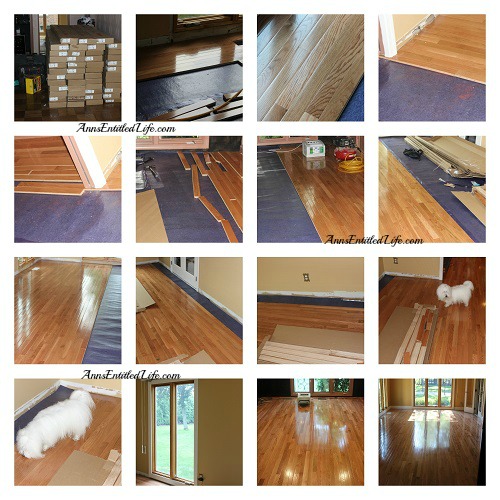
Keenan laid down the Bellawood Premium Underlayment taping the seams together. He measured and remeasure to get a straight line (he used nails and a snap-line for plumb). It is extremely important to have the first piece of flooring straight so all the other pieces install straight too. The first piece goes in 1/4″ from the wall. The base molding (and/or shoe molding) will cover that gap. This allows for a tiny bit of wiggle room in case your room isn’t square (and ours are not).
A Flooring Air Nailer (pneumatic nail gun) is used to nail in all the wood flooring pieces until you get close to the last wall. No nails show when this nailer is used. The last few rows where the gun is too large to nail, are nailed in by hand. The nails are then set in those last rows with a nail-setter, and filled in with a tiny bit of wood putty.
We have pocket doors in between the two rooms, and a few flooring vents. These would have presented huge challenges if Hubby and I had attempted this project, for Keenan they were no big deal. He would measure, set up some pieces staggering long and short for maximum beauty and strength, then cut where necessary.
The front of our house is brick so when it came to installing the casement molding that did present a challenge because of how the windows are installed. Keenan ripped wood to install underneath those casement moldings. Unless you are staring at the moldings intently, you would never notice a thing! The other window challenge is they are all low to the floor. That meant only a few inches of base molding could go underneath, and not the full 5 1/2″ molding. Again he cut out the pieces of molding exactly to install, and it looks like a seamless continuation of the base molding.
Because Keenan is a professional, we didn’t use shoe molding in the living room – there was no real need. He planed the bottom of the base moldings so they were flush with the floor leaving no gaps to hide with shoe molding. Hubby’s office was another story. It has a unique paneling on it that goes to the floor, but there was a gap. There aren’t any moldings in his office, and we didn’t feel they fit (the paneling is that unique), so Keenan only installed shoe molding in that room.
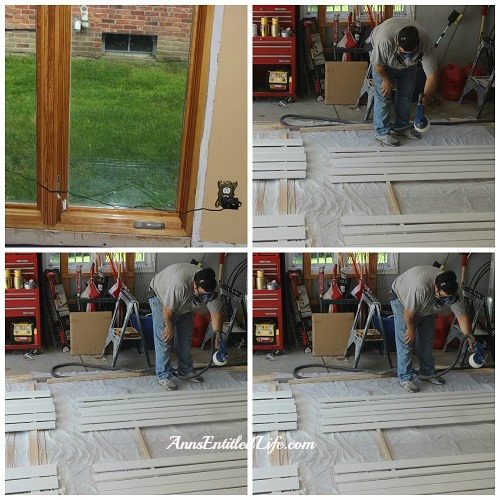
I wish I had pictures of how we stained and polyed the shoe molding, but I neglected to take them. Hubby and I purchased oak shoe molding. Regardless of whether the base molding are painted or polyurethaned wood, I want my shoe molding to be polyurethaned and not painted. Some people call it a design choice, I call it common sense. Shoe molding are there to cover gaps from base to floor and they have the added bonus of protecting the base molding from being banged into and damaged. If you have painted shoe molding take a look at it and see if it is dinged and dented from the vacuum, kids, dogs, etc. Now if you also have polyurethaned shoe molding, take a look at that and see if you can see any of the dings and dents? You can’t, can you? And that is why when presented with hardwood flooring, I will always polyurethane my shoe molding to match the floors, regardless of whether or not the wood is painted (of course if the base molding is polyurethaned you will poly the shoe too).
Hubby decided we would give Minwax polyshades a try. If we could match the color, it would save us a step in the staining and polyurethaning process as this product contains color and polyurethane in one mixture. Hubby sprayed one coat, and then as a color test he sprayed an end with a second coat to see which would match better (if at all). One coat was perfect (we used pecan)! And so that meant we only needed a light sanding (220 grit) and two more coats of clear polyurethane satin (also by Mixwax). My grandfather (who was a cabinetmaker for a prestigious American furniture maker for 20 years until he was booted upstairs to the office) has always maintained three coats is enough 99% of the time – he has always felt you were wasting time and product after three coats of spray (with a light sanding in between) as four or more coats were not giving incremental protection.
All in all these two rooms took Kennan several days longer than expected. He was finished in just under two weeks.
Tomorrow, Hardwood Floor Installation Part 3 aka the nightmare that was the family room, and why hiring a professional is many times worth more than what you paid!
See also:
● Hardwood Floor Installation Part 1
● Hardwood Floor Installation Part 2
● Hardwood Floor Installation Part 3
● Hardwood Floor Installation Part 4
● If you enjoyed this post, be sure to sign up for the Ann’s Entitled Life weekly newsletter, and never miss another article!
● For more Renovation projects on Ann’s Entitled Life, click here.
Charlotte says
Thanks for linking up.
Shell says
Your contractor sounds just great! I am married to one of those super picky contractors. Finally he is doing some work on our house. He is putting down new flooring in the whole house and a small project in the kitchen. If I am lucky he will then do the room addition I am asking for. I want a kitchen pantry and master bedroom closet. We shall see how long it even takes with the flooring. So far we have the living room, dining room and hall done. No sign of starting other rooms yet, so that addition may just be a dream I have. I guess we all need a dream 🙂
Ann says
Good luck, Shell!
Ann
Jay @craftyspices says
Wow… Looks awesome, I’m sure it was not easy but well worth it.
NYCSingleMom says
excited for you. Fantastic looking for floor. Thanks for stopping by WW.