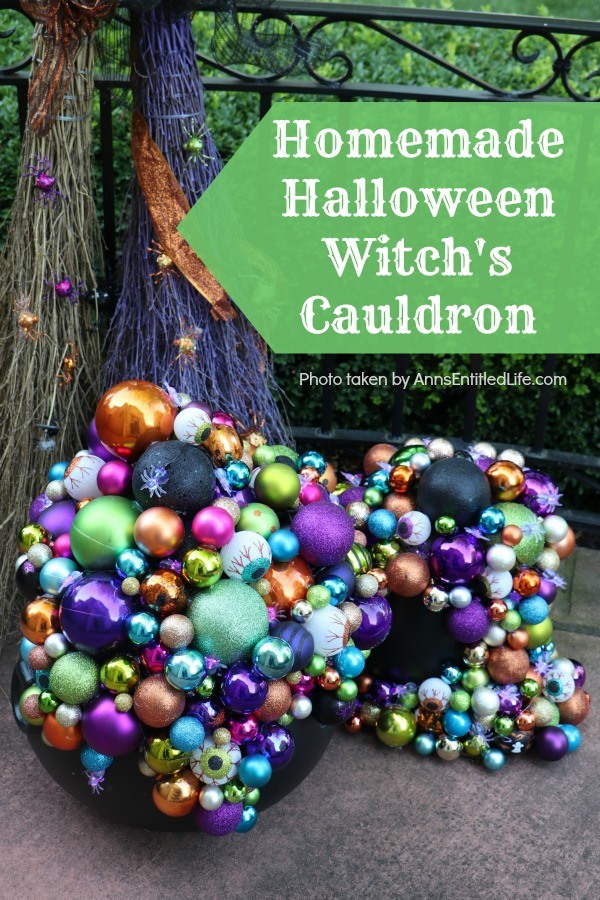
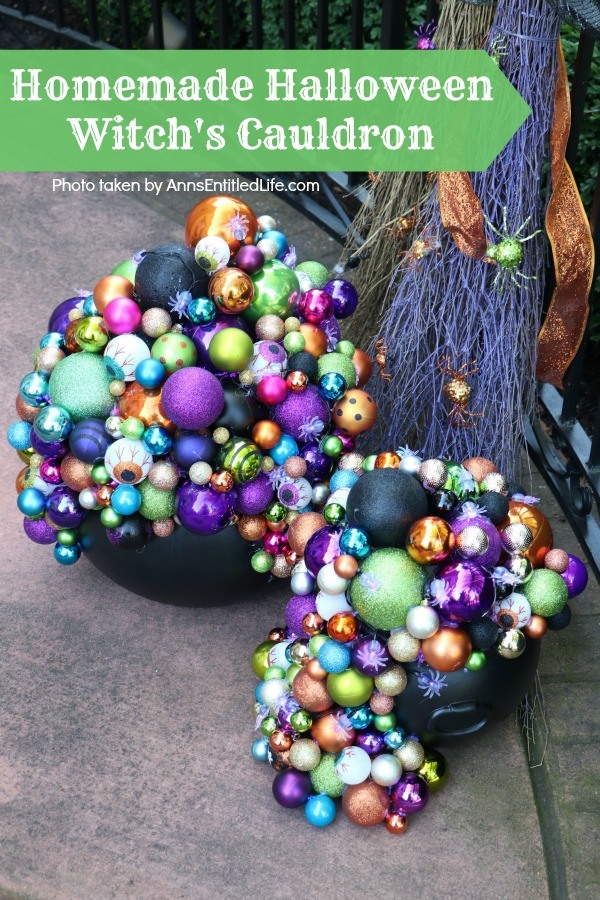
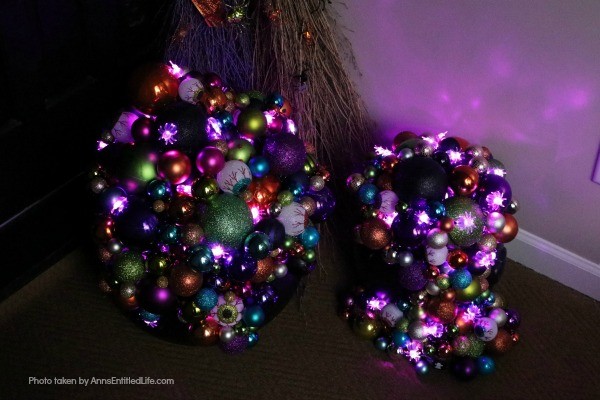
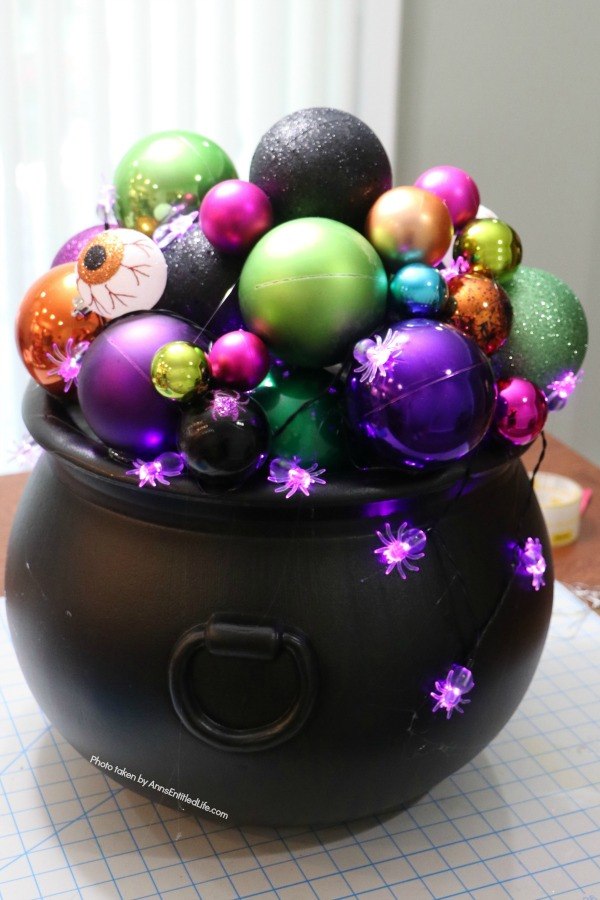
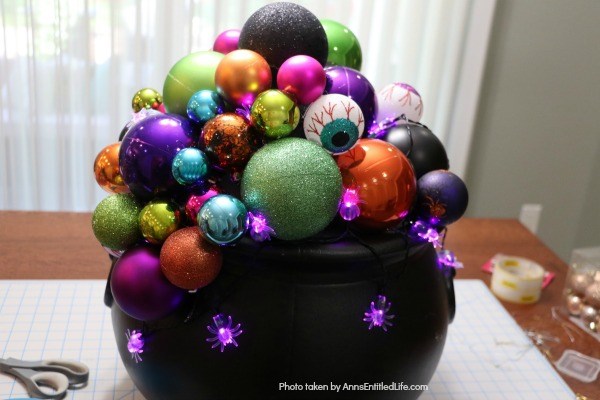
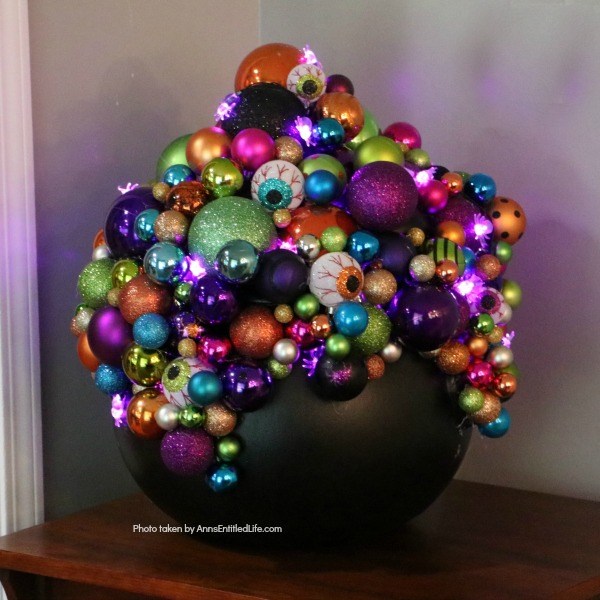
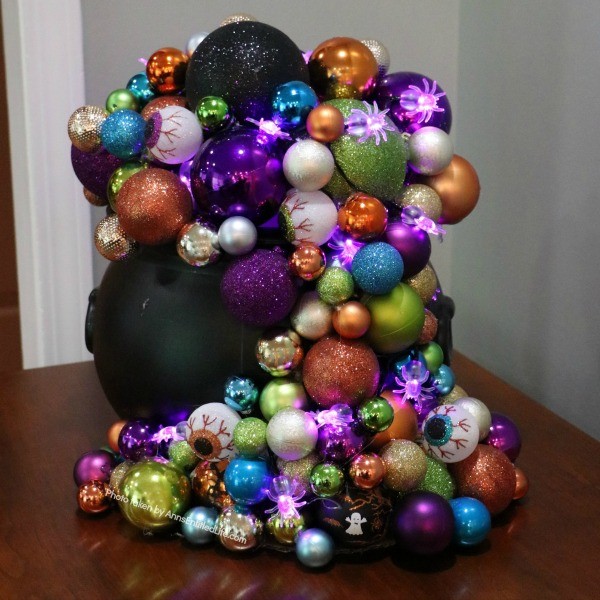
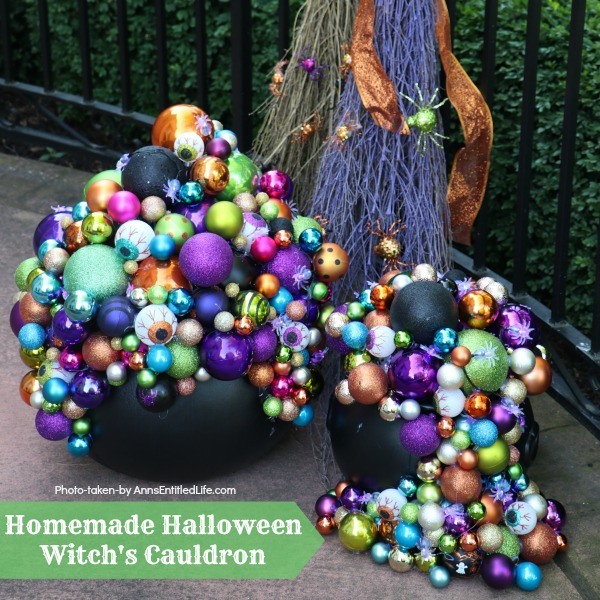
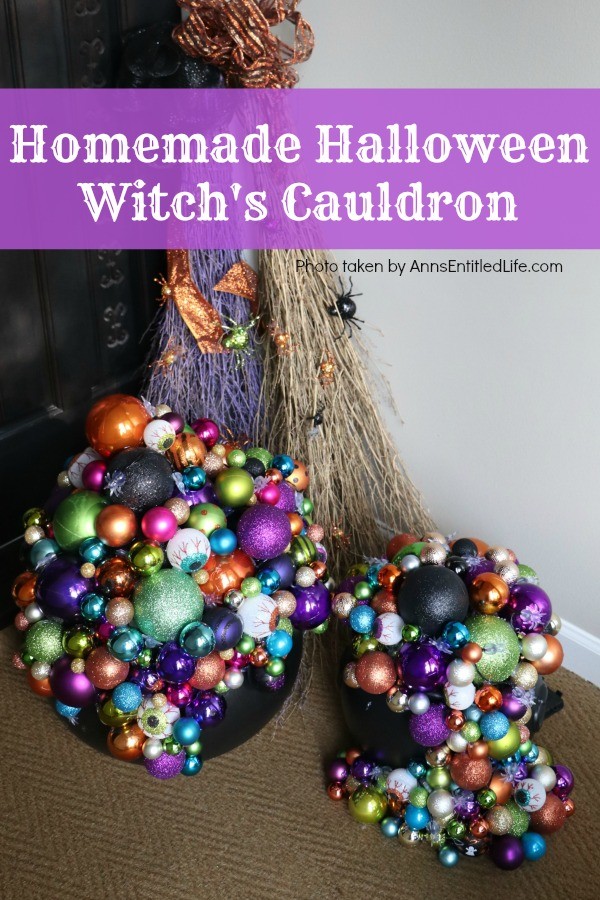
Make these striking witches’ cauldrons for Halloween this year! This homemade cauldron packs a real visual punch. Beautiful to look at and creepy without being scary, this homemade Halloween witch’s cauldron is great for Halloween décor, delight trick-or-treaters, or as a fabulous Halloween party prop.
Homemade Halloween Witch’s Cauldron
This was an idea that I have had simmering in the back of my mind ever since we made the Bubbly New Year’s Eve Table Décor craft. I figured if those bulbs made great bubbles from a champagne glass, why not for a Halloween cauldron?
I made the Easy DIY Halloween Glitter Witch’s Broomstick craft years ago. I gave one to my mother and kept the other two. They are on display in my front hall throughout October (I really dress up that hall), but I thought they could use “more.” After all, Halloween is all about over-the-top!
So, why not a cauldron?
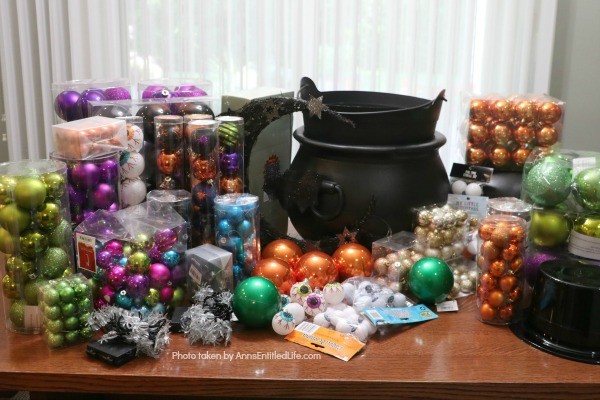
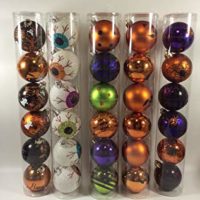
I bugged my niece to put this on our craft list, and then I started buying the supplies. I knew what I wanted but did not have any idea how many bulbs these crafts would use or how much I should buy. I thought I really over-bought (see supply table photo below), but I didn’t. I purchased two matching cauldrons, one open kettle cauldron, and then my niece got a fantastic Halloween wreath we also bulb bubbled. After everything was made, the bulbs were almost all used up!!
This homemade Halloween Witch’s Cauldron is basically a shatterproof piece of holiday art. There is no real manual skill needed to make this, but you need to have a vision – your vision – to make one of these.
This craft is all about the notes. There are a few steps once you get the base down, but there are many, many tips on how to go about making this visually stunning.
This is not an inexpensive craft to make. I’d suggest you purchase the bulbs with coupons at JoAnn, Michaels, or Hobby Lobby if you can. Or, wait until after Halloween or Christmas and get the bulbs on clearance. Some other ideas are garage sales, dollar stores, Goodwill, or Salvation Army.
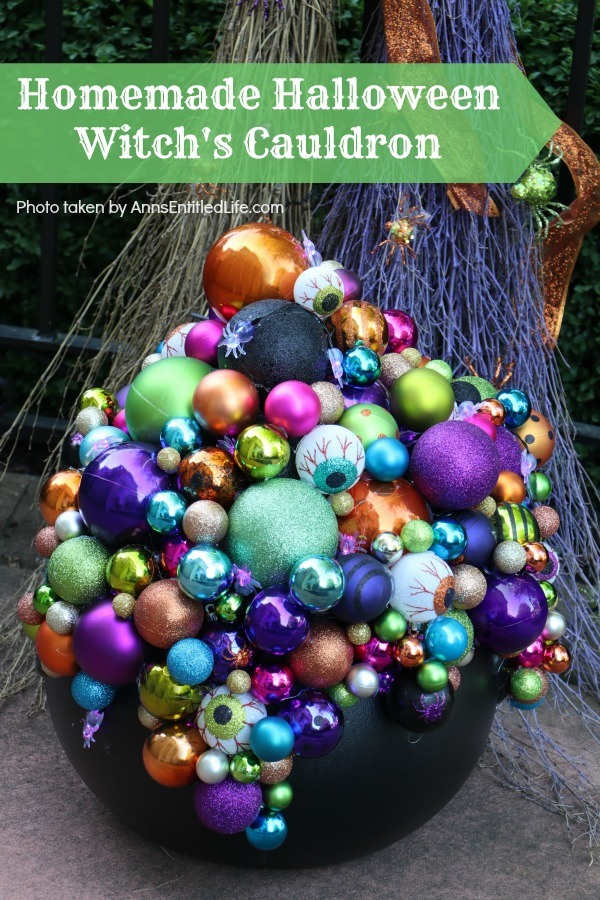
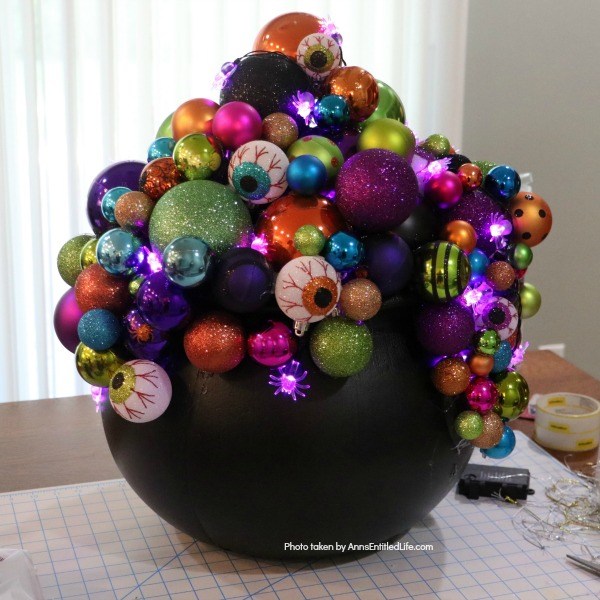
The smaller your cauldron the less cost prohibitive this craft. That large cauldron is in a 16″ bucket and the cost of the craft was in excess of $200 with the specialty bulbs. If you want a large cauldron, leaving out the specialty bulbs could save you quite a lot (maybe one large eyeball for effect?)
Another way to go on this craft is instead of colorful bulbs, monochromatic say in purple and black bulbs in various shades and textures would be stunning with lights and fog!
Tips and variations for making this Homemade Halloween Witch’s Cauldron:
● If this is an outdoor display, drill several holes into the bottom of your cauldron before beginning. That way, any rainwater will be able to seep out.
● If this is to be an outdoor display, weigh down the bottom of your cauldron with a few red bricks (which you can buy at Home Depot if you have none at your house) as this craft does not weigh very much at all and the wind will take it away! Make sure not to cover the seep holes.
● If you want a fog machine to put inside this craft, make sure to leave lots of holes via the bulbs, and check the fog machine directions so that an obstructed pathway is not an issue. I have seen small ones that might fit but did not add one to either of these. You are on your own with that. Hubby insists these need a fog machine which we are going to put behind these two, and we will be using a larger one.
● Make certain the bulbs you purchase are shatterproof!!!
● This craft is about textures and sizes as well as colors. You will want to make sure to buy different textured bulbs such as sparkly, matte, shiny, dimpled, etc. Purchase different-sized bulbs as you will start large and end up small. You are not just matching or complimenting colors; you are matching and complimenting textures, colors, and sizes.
● The top portion of this craft comes together very quickly. The draping of the bulbs down the side of the cauldron and waiting for the hot glue to dry is what takes time.
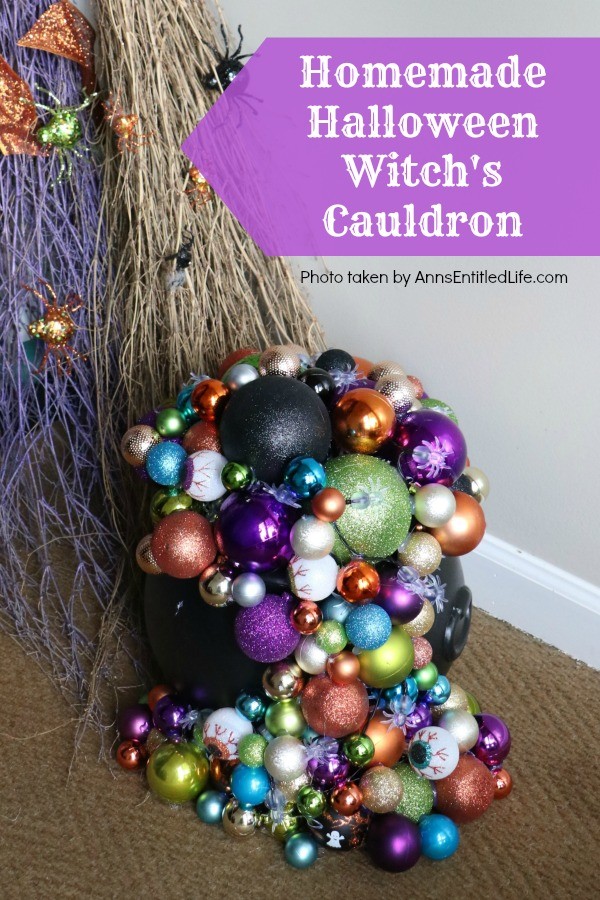
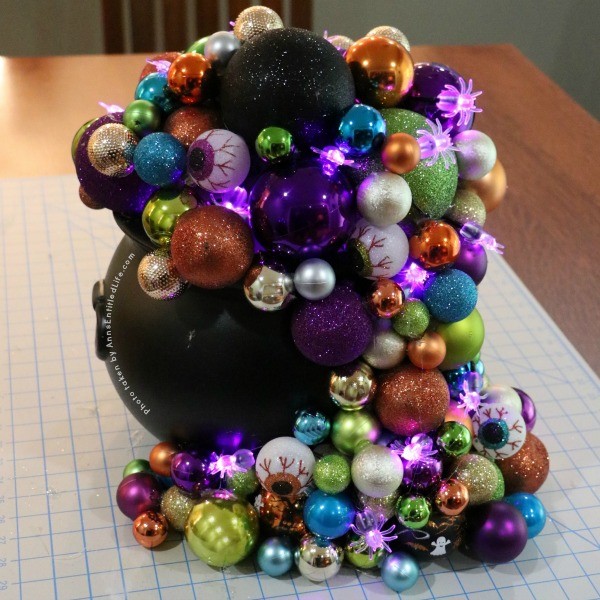
● Make sure you take a step back from your cauldron while adding bulbs. This craft is time-consuming. The smaller one (this medium-sized cauldron) was done in 90 minutes with the added spill. Without the spill, it is about an hour. However, the large cauldron? That look over four hours! Walking away from the entire craft for an hour, overnight, or a few days can help you decide where the next batch of bulb-bubbles should be built and what colors and textures look best together. Do not be afraid to allow this to live on your craft table for a week while you complete it.
● When polishing your craft (say the last 10-15%), you may have to decide not to add much to a particular area. All the little decisions matter in the end. Take that step back and put it aside. You need to decide where you want negative space (either through a hole or black bulbs). While this is an excessive craft (to say the least!!), those dark spaces in a Halloween cauldron do matter. There is a natural bubble aeration, large and small, dark and light, and this is what you are trying to mimic.
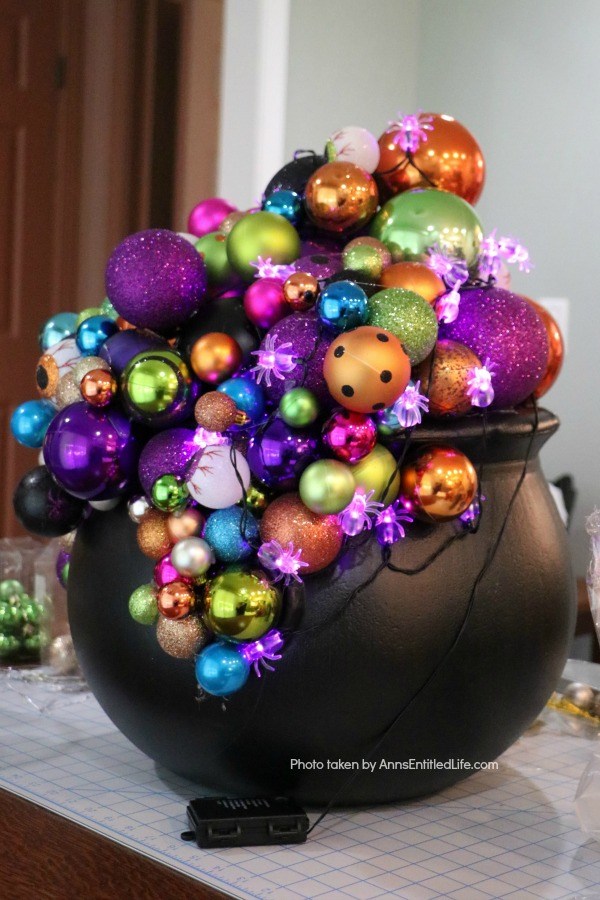
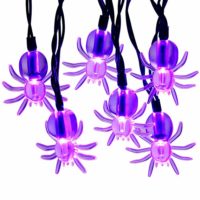
● We used these spider lights and I highly recommend them to work with. They are rubbery-plastic and they can be easily hot glued in place. There are eight settings, and they work great. You do not have to add lights to these, but it does look cool at night.
● The spider light can also be used to cover up the ornament cap when you cannot turn it down.
● With the specialty bulbs (eyeballs, spiders, ghosts), they may not be able to be turned upside down to look “right.” That is where the spider-light-hiding can come in very handy.
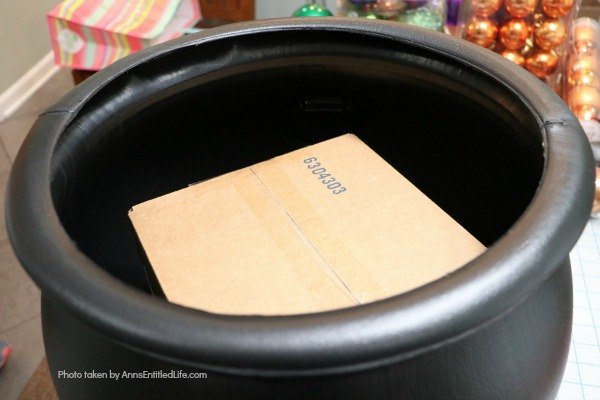
● A big savings tip is to use a box to take up space in the cauldron instead of packing it using only floral foam.
● Hot glue strings are not bad on this craft!! A high-temp glue gun was used. It worked great, but watch so you do not burn your fingers.
● Can Goop work? I’d say yes, but it will be more time-consuming. While we did not use it, if you plan on having an outdoor cauldron Marine Goop + hot glue might be a better choice than hot glue alone. To use, a dot of Goop, then hot glue, place bulb, and hold to set. The hot glue will set up fast, the Goop taking longer to dry, but this way, you will not have to wait for the Goop to dry before going on to the next bulb.
● If you want spider webbing on this craft, apply it at the end over the top of the cauldron. Spider web does not hold up very well, so you will probably want to replace it yearly. Building it into a cauldron would make that difficult.
● How many bulbs will you use? The honest answer is, “I don’t know.” It will depend on how large your cauldron is, how many large bulbs you use, how many mediums, etc. To give you an idea:
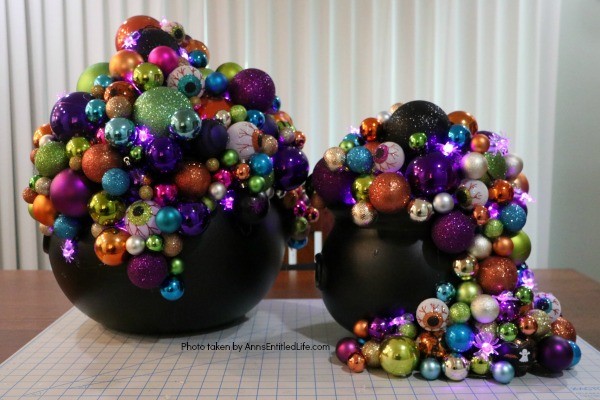
● 16″ Cauldron: 6- 4″ bulbs + 16 3″ bulbs were used. After that, everything was 2.5″ or smaller.
● 12″ Cauldron: 2- 4″ bulbs + 6- 3″ bulbs we used. After that, everything was 2.5″ or smaller.
There is just a lot less space on that medium-sized cauldron. That was not all good… there were a LOT of spiders for that smaller (12″) space. However, the 12″ cauldron ended up with a different vibe from the 16″ cauldron because the lights are a much bigger part of the 12″ cauldron’s impact. Both these cauldrons have an 80s feel going for them with vibrant colors.
I am going to link to everything I bought (which was a lot, but I got 3 cauldrons and one wreath out of it). If I were to make a cost-cutting decision, I would keep the eyeballs and spider lights before any of the other specialty items. You may not like the eyeballs, but they really are a great touch of whimsy.
And, as I said, the 12″ cauldron was a lot less costly (even with the spill) than the 16″ cauldron – less than half the price. It just used smaller bulbs.
Homemade Halloween Witch’s Cauldron Materials:
● 12″ Cauldron
● 16″ Cauldron
● Piece of Cardboard
● Cardboard Box
● Dry Floral Foam
● Wet Floral Foam
● Shatterproof Ornaments – Colors used: black, green, orange, purple, blue, gold, dark bronze, and pink, all in various shades and sizes.
Best purchases:
● 50ct Vibrantly Colored Shatterproof Shiny and Matte Christmas Ball Ornaments 1.5″-2″
● Spider Lights
● Eyeball Ornaments
Other Bulbs Items Purchased:
● Glitter Ornaments (5 Assorted Sets) – this was a fabulous set, but it was not cheap
● 4″ Bulbs – purchased black, orange, green, purple
● 3.2″ bulbs – purchased purple and green
● 2.5″ bulbs – purchase purple, ornage, green, and black
● 2.3″ Bronze
● 1.5″ bulbls – purchased blue and green
● 3 cm Ornaments – purchased green, orange, purple, and black
Homemade Halloween Witch’s Cauldron Tools:
● Hot Glue
● Hot Glue Gun
● Scissors
Homemade Halloween Witch’s Cauldron Directions:
● If outside, see the notes above about weep-holes and weighing down the cauldron.
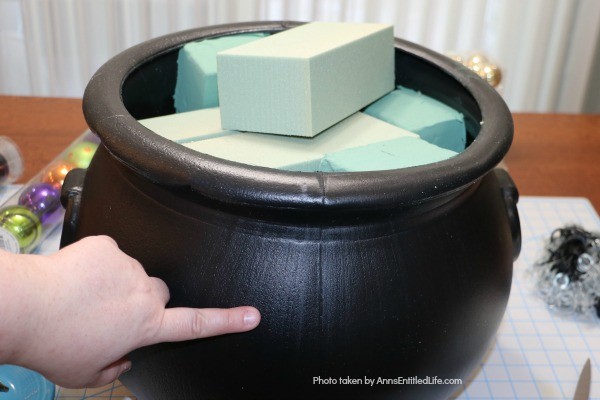
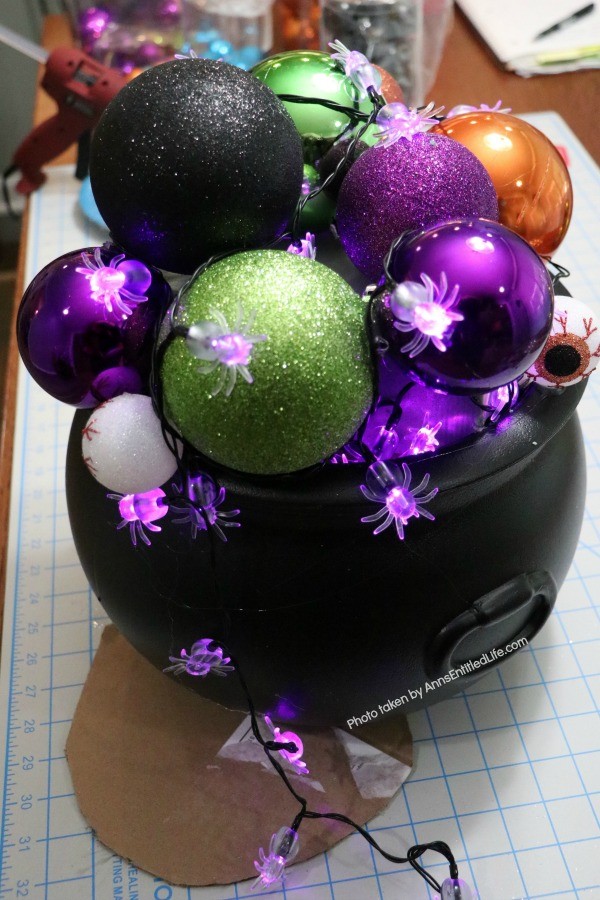
● Place a small cardboard box inside the cauldron, hot glue in place.
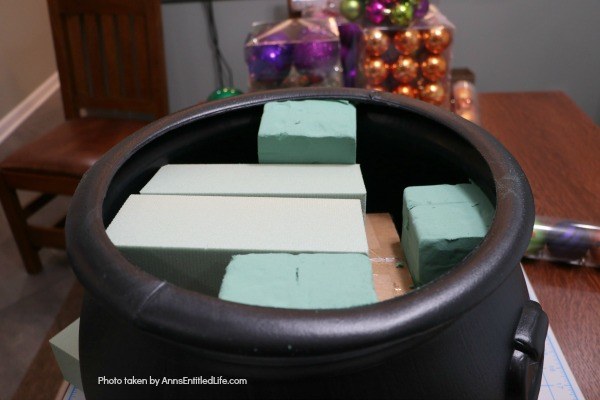
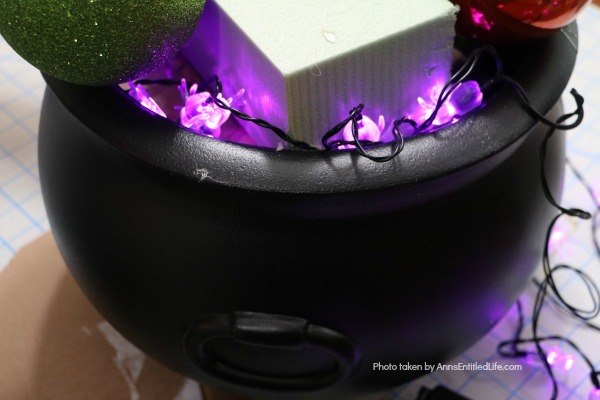
● Insert foam to wedge the box in place (wet floral foam will wedge nicely without cutting, if using dry foam, you will need to cut to fit). Add more foam to fill any gaping holes (dry floral foam is fine).
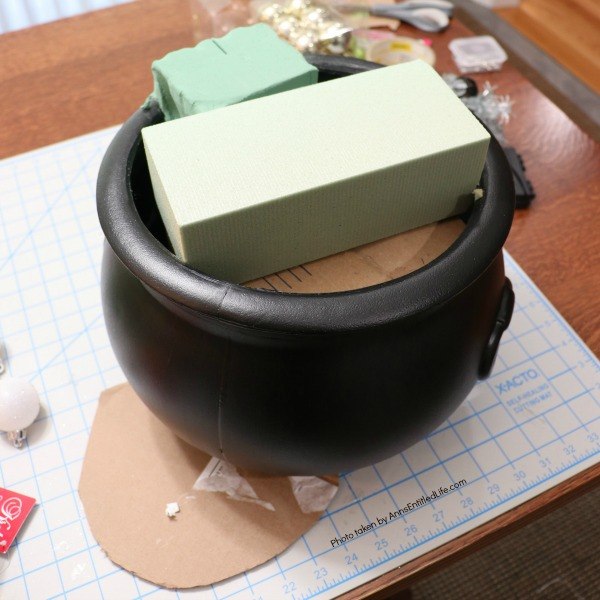
● Add floral foam to the top of the box, and then add another floral foam on top of that. Make certain there is some sloping as that will help you build your base and the direction your eye will take when your bubbles “overflow.” Hot glue in place.
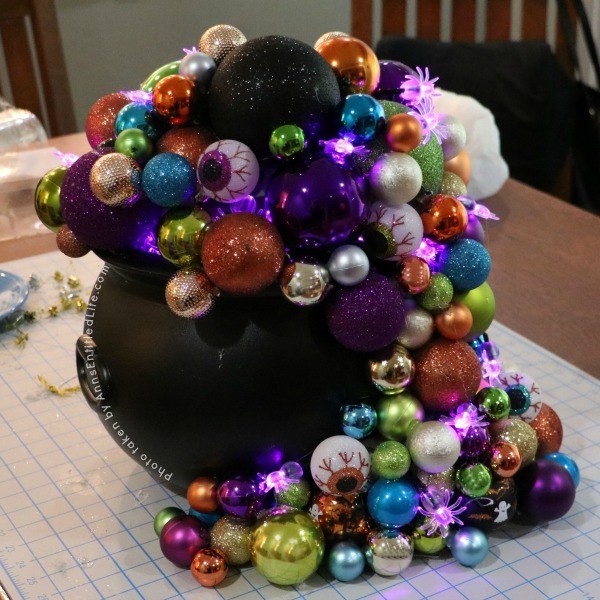
● If you are creating a spill, cut out some cardboard to mimic a flow and hot glue to the bottom of the cauldron.
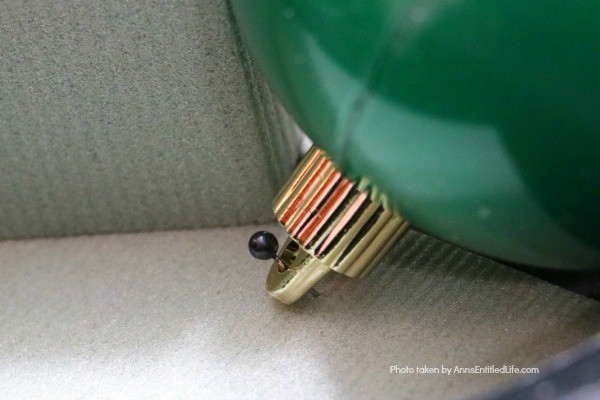
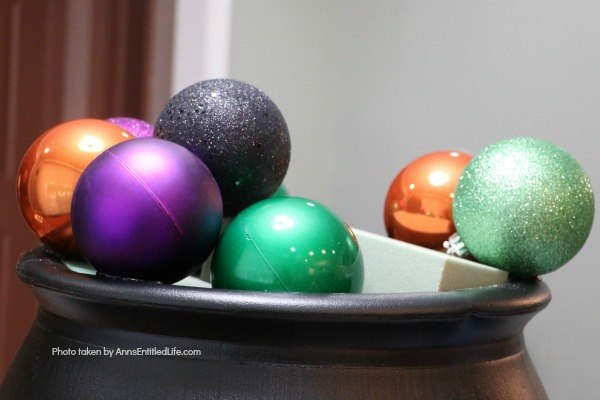
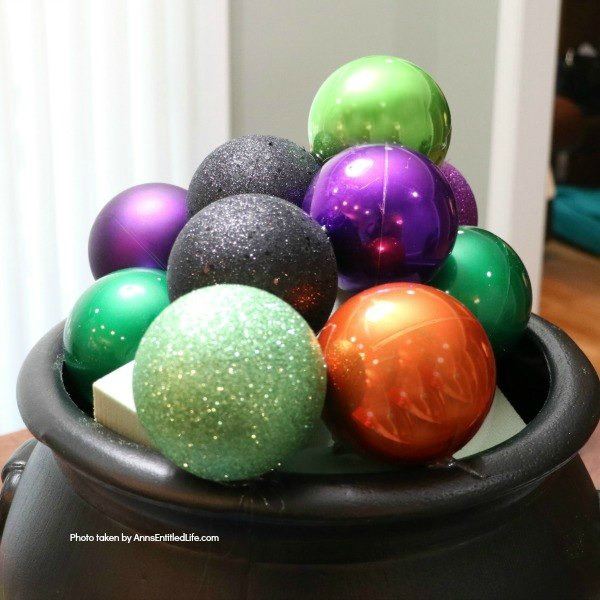
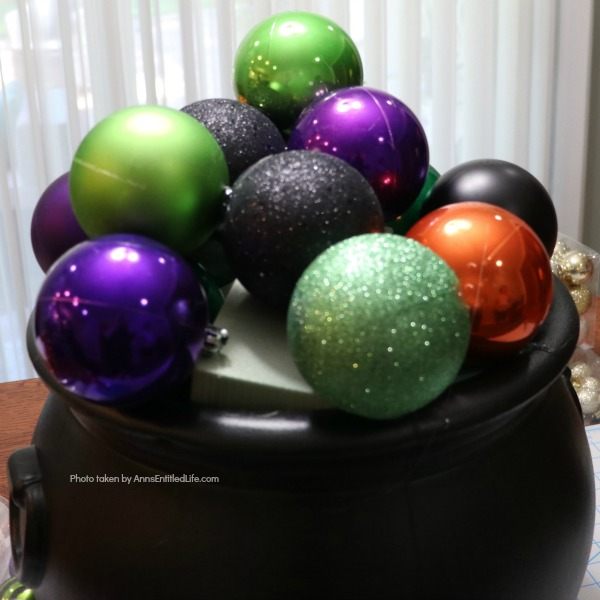
● Begin placing several 4″ bulbs on top of the floral foam to build the top. Place downward so the cap is facing the floral foam. Pin and hot glue in place.
● Add some 3″ bulbs. Hot glue in place (pin if you can). There is no such thing as too much hot glue or securing on this craft.
Note: if you ornaments have strings, take them off.
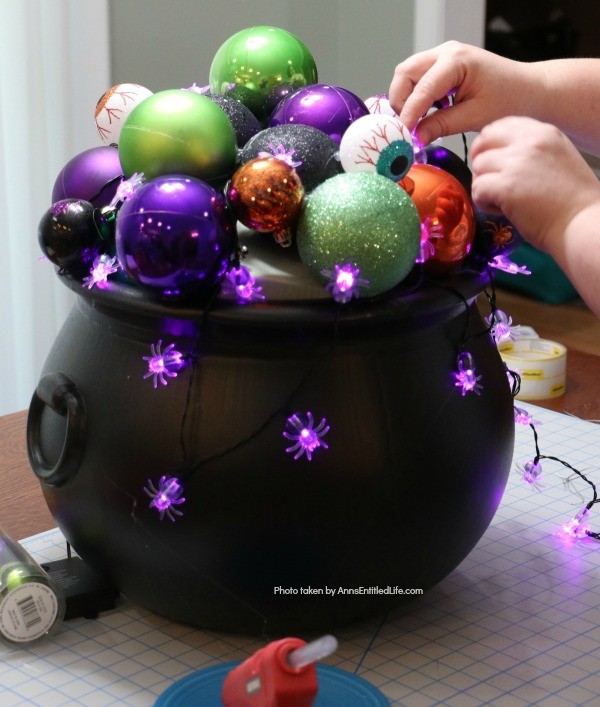
● Once the first layer is complete, add a layer of spider lights.
● If using a smaller cauldron, you will need to “bury” about 10 inside the cauldron if you have a spill. This works well for a glow. If you decided against a spill, you will either need to bury a few more spiders inside the cauldron or hot glue more to the sides at the end. For the 16″ cauldron, there is no need to bury any spiders. Make sure the battery box is on the outside of the cauldron and contains batteries. Always turn on your lights when working on a craft project as it gives you a better idea of what the finished project will look like when finished, with batteries on and lights glowing.
Note: once you are no longer pinning the ornaments to the foam, you can remove the caps if you like.
● Make certain you are turning your cauldron as you are adding bulbs and light, especially if this is to be a 360° display.
● Be aware of texture, size, and colors as you begin to add smaller bulbs to the next level. You may decide to add more large bulbs as you build.
● Continue to add bulbs and hot glue the spiders in place as you build higher. The wires will need to be hidden if you can. Against the black bulbs, we didn’t hide the wires as they blended.
● Once the top of your cauldron is built, you will want to add some bulbs to drape down the side of your pot, mimicking an overflow. If you have a spill, you will want to work on that before completing the top of your cauldron. The line on the side of your cauldron is a great guide throughout this process on where your overflow is being built and how the height of your cauldron bubbles mesh with that flow.
● Continue adding bulbs and affixing the lights until you are satisfied with the way your cauldron looks.
● Even though you have been turning your cauldron to make sure you have looked for any errant holes, clashing colors, or lack of flow, as well as looking from above, before you clean up, give everything another look or two “just to be sure.” Make sure all your bulbs are securely fastened and secure any that may have come loose.
● Display as desired.
Homemade Halloween Witch's Cauldron

Homemade Halloween Witch's Cauldron. Make these striking witches cauldrons for Halloween this year! This homemade cauldron packs a real visual punch. Beautiful to look at, creepy without being scary, this homemade Halloween witch's cauldron is great for Halloween décor, delight trick-or-treaters, or as a fabulous Halloween party prop.
Materials
- 12″ Cauldron
- 16″ Cauldron
- Piece of Cardboard
- Cardboard Box
- Dry Floral Foam
- Wet Floral Foam
- Shatterproof Ornaments – Colors used: black, green, orange, purple, blue, gold, dark bronze, and pink, all in various shades and sizes.
- Best purchases:
- 50ct Vibrantly Colored Shatterproof Shiny and Matte Christmas Ball Ornaments 1.5″-2″
- Spider Lights
- Eyeball Ornaments
- Other Bulbs Items Purchased:
- Glitter Ornaments (5 Assorted Sets) – this was a fabulous set, but it was not cheap
- 4″ Bulbs – purchased black, orange, green, and purple
- 3.2″ bulbs – purchased purple and green
- 2.5″ bulbs – purchase purple, orange, green, and black
- 2.3″ Bronze
- 1.5″ bulbs – purchased blue and green
- 3 cm Ornaments – purchased green, orange, purple, and black
Tools
- Glue Gun
- Hot Glue
- Scissors
Instructions
- If outside, see the notes on the blog about weep-holes and weighing down the cauldron.
- Place a small cardboard box inside the cauldron, hot glue in place.
- Insert foam to wedge the box in place (wet floral foam will wedge nicely without cutting, if using dry foam you will need to cut to fit). Add more foam to fill any gaping holes (dry floral foam is fine).
- Add floral foam to the top of the box, and then add another floral foam on top of that. Make certain there is some sloping as that will help you build your base and the direction your eye will take when you bubbles "overflow". Hot glue in place.
- If you are creating a spill, cut out some cardboard to mimic a flow, and hot glue to the bottom of the cauldron.
- Begin placing several 4" bulbs on top of the floral foam to build the top. Place downward so the cap is facing the floral foam. Pin and hot glue in place.
- Add some 3" bulbs. Hot glue in place (pin if you can). There is no such thing as too much hot glue or securing on this craft.
Note: if you ornaments have strings, take them off. - Once the first layer is complete, add a layer of spider lights. If using a smaller cauldron you will need to "bury" about 10 inside the cauldron if you have a spill. This works well for a glow. If you decided against a spill, you will either need to bury a few more spiders inside the cauldron, or hot glue more to the sides at the end. For the 16" cauldron, there is no need to bury any spiders. Make sure the battery box is on the outside of the cauldron, and contains batteries. Always turn on your lights when working on a craft project as it gives you a better idea of what the finished project will look like when finished, with batteries on and lights glowing.
Note: once you are no longer pinning the ornaments to the foam you can remove the caps if you like. - Make certain you are turning your cauldron as you are adding bulbs and light, especially if this is to be a 360° display.
- Be aware of texture, size and colors as you begin to add smaller bulbs to the next level. You may decide to add more large bulbs as you build.
- Continue to add bulbs and hot glue the spiders in place as you build higher. The wires will need to be hidden if you can. Against the black bulbs, we didn't hide the wires as they blended.
- Once the top of your cauldron is built you will want to add some bulbs to drape down the side of your pot mimicking an overflow. If you have a spill, you will want to work on that before completing the top of your cauldron. The line on the side of your cauldron is a great guide throughout this process on where your overflow is being built, and how the height of your cauldron bubbles mesh with that flow.
- Continue adding bulbs and affixing the lights until you are satisfied with the way your cauldron looks.
- Even though you have been turning your cauldron to make sure you have looked for any errant hole, clashing colors, lack of flow, as well as looking from above, before you clean up, give everything another look or two "just to be sure". Make sure all your bulbs are securly fastened, and secure any that may have come loose.
- Display as desired.
Recommended Products
As an Amazon Associate and member of other affiliate programs, I earn from qualifying purchases.
-
 Darice Halloween Eyeball 45mm Plastic Mini Ornaments Set of 8
 -
 RECESKY Purple Spider String Lights Build-in Timer - 40 LED 14ft Battery Operated Halloween String Lights for Halloween Party Decor, Halloween Decoration, Halloween Lighting, House, Garden, Yard
 -
 Darice Halloween Decor - Glitter Ornaments (5 Assorted Sets)
● For more Craft posts on Ann’s Entitled Life, click here.
● If you enjoyed this post, be sure to sign up for the Ann’s Entitled Life weekly newsletter, and never miss another article!

Michelle says
Simply fabulous! Pinning!
Dana Studer says
So cute! Where are these bulbs you speak of? Are these lightbulbs that are turned upside down and painted or are these round Christmas balls? I don’t see lightbulbs in the list of supplies.
Ann says
More like Christmas bulbs, Dana. I linked to what I bought in the post under materials. These are also included:
• Glitter Ornaments (5 Assorted Sets) – this was a fabulous set, but it was not cheap
• 4″ Bulbs – purchased black, orange, green, purple
• 3.2″ bulbs – purchased purple and green
• 2.5″ bulbs – purchase purple, ornage, green, and black
• 2.3″ Bronze
• 1.5″ bulbls – purchased blue and green
• 3 cm Ornaments – purchased green, orange, purple, and black
Some of the bulbs were definitely meant for a Christmas tree (the aqua, pink, bronzes), some could be either (the purple and green), and others were more specifically for Halloween (orange, black, eyeballs, specialty bulbs).
I was in a dollar tree store last week that had six-packs of Halloween specialty bulbs, including two eyeball bulbs per pack. They were not as nice as what I ordered, but for the price!? Can’t beat it. You can also order them online when you click this link.
Ann
yvette Jimenez says
best to buy em right after xmas 50 or more percent off
Marie says
These are just too stink’n cute and creative! Pinned 🙂 Thanks for sharing your cauldrons with us at the Talk Of The Town Party.
Rebecca Payne says
So, so cute. I love it.
Tammy says
How cute are these? I love this. I’ve been wanting to make a cauldron with bubbles for a couple of years but keep putting it off. After seeing these I think I need to get started. Great job. Thanks so much for sharing!
Michele Graham says
Fantastic and I love the addition of the spider lights. The spider lights bring it all together for me. Thanks for sharing at Funtastic Friday.
Niki ~ Life as a LEO Wife says
Thanks for sharing on Happiness is Homemade & Crafty Creators. I’ll be featuring your post on Sunday’s HIH over at Life as a LEO Wife. Hope to see you at both parties!